

| Manufacturer | BlackVue | Thinkware | Viofo |
|---|---|---|---|
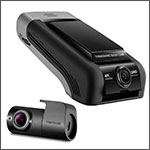
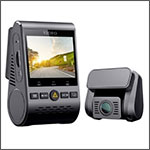
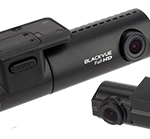
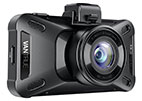
| Model | DR590W-2CH, DR750S-2CH, DR900S-2CH, DR900X-2CH | F800 Pro Bundle, Q800PRO, U1000 | A129 PRO Duo |
| Product | 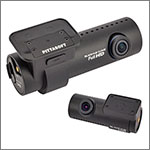 |
 |
 |
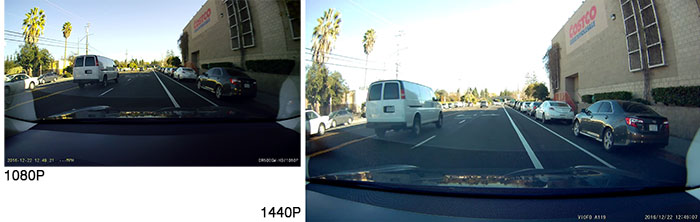
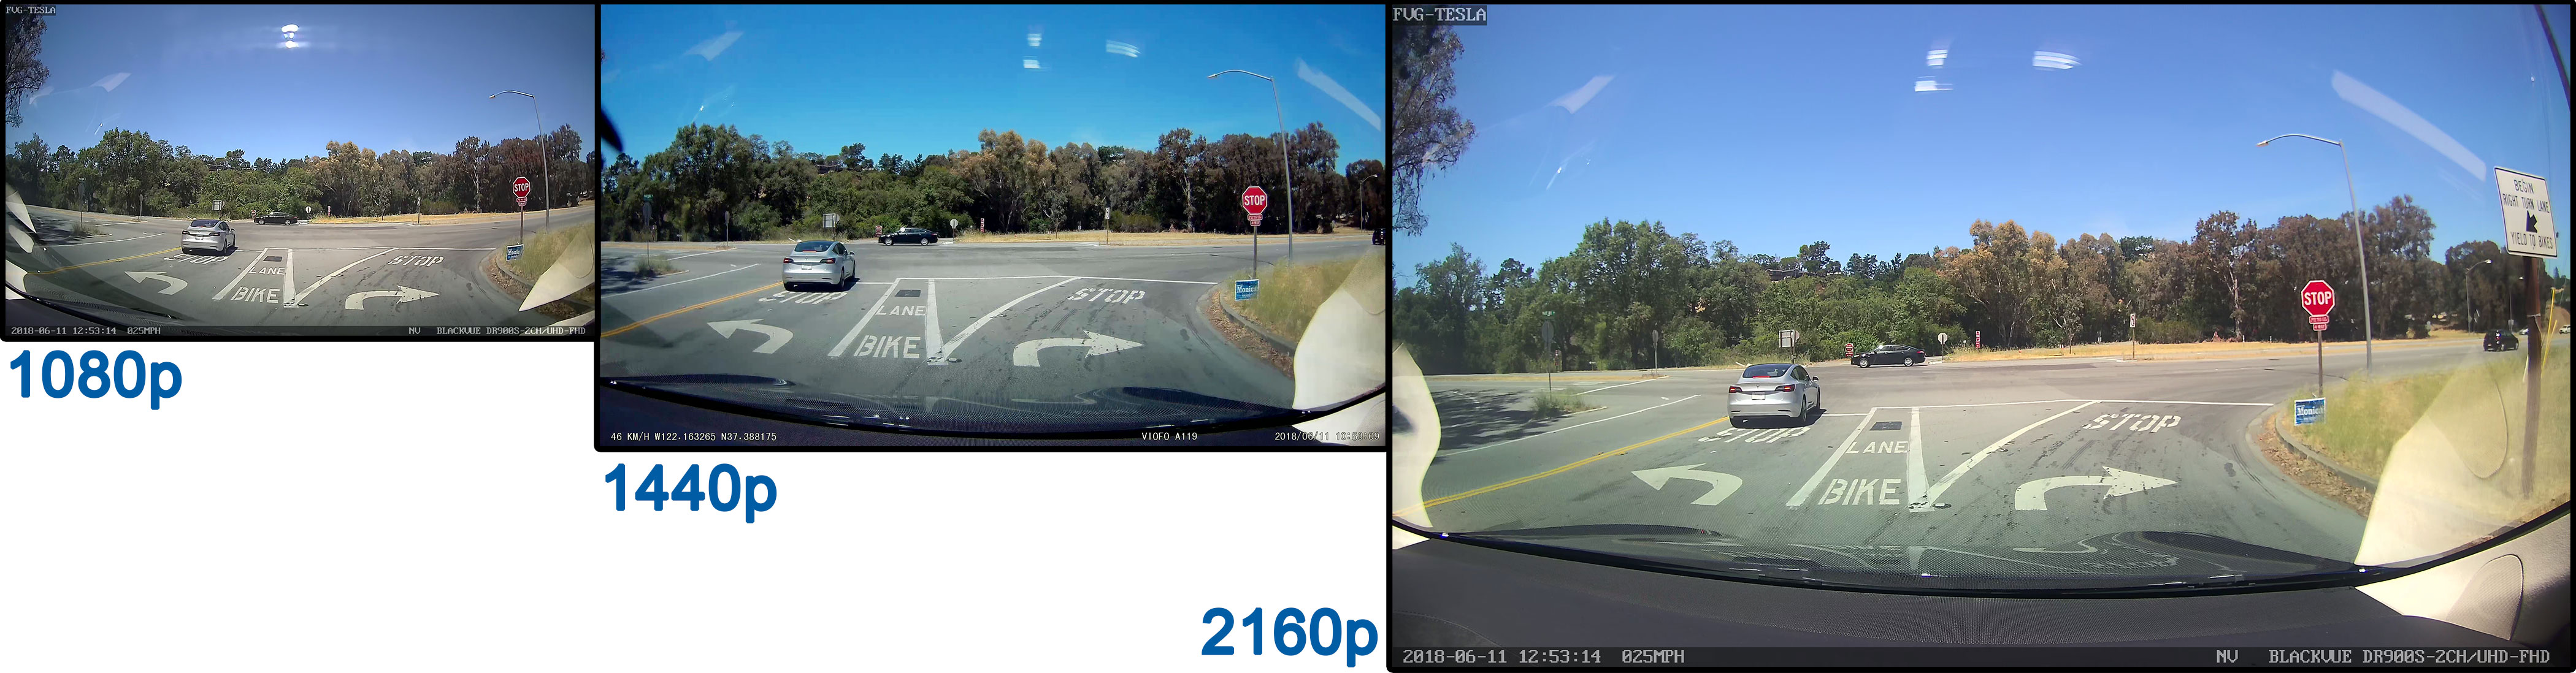
| Resolution Front | 1080p 30 fps (590W), 1080p 60 fps (750S), 2160p 30 fps (900) | 1080p 30 fps (F), 1440p 30 fps (Q), 2160p 30 fps (U) | 2160p 30 fps |
| Resolution Rear | 1080p | 1080p | 1080p |
| Price | High | High | Medium |
| Included SD Card | 16-128 GB | 32 GB | None |
| Max bit rate Mbps F=Front, R=Rear | F: 10, R: 10 (590S), F: 12, R:10 (750S), F: 25, R 10 (900) | F: 9.5, R: 8 (F) Unknown (Q, U) | Not specified |
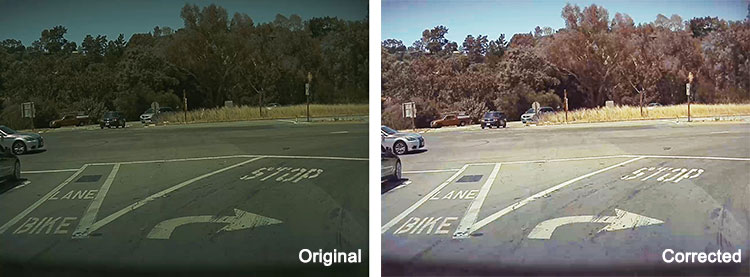
| Wide Dynamic Range | Yes | Yes | Yes |
| Video Format | MP4 | MP4 | MP4 |
| In-Unit Video Playback | No | No | Yes |
| WiFi | 2.4 GHz (all) 2.4 & 5 GHz (900) | 2.4 GHz | 2.4 & 5 GHz |
| Bluetooth | No | No | Yes |
| App Win/Mac | BlackVue Viewer | PC Viewer | Dashcam Viewer |
| App Tablet/Phone | Android and iOS | Android and iOS | Android and iOS |
| Audio Record | Yes | Yes | Yes |
| GPS | Yes | Yes | Yes |
| Backup Power | Capacitor | Capacitor | Capacitor |
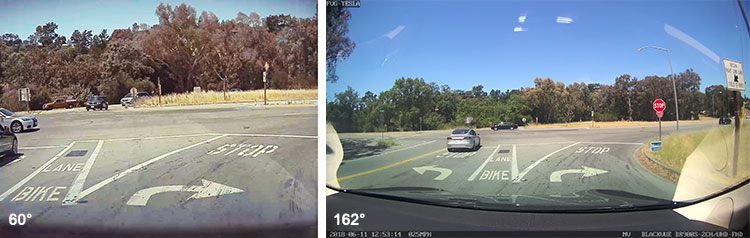
| Lens (Front) | 139° (590W, 750S), 162° (900) | 140° | 130° f1.8 |
| Lens Adjust | Vertical only | Vertical only | Vertical only |
| LCD display | No | No | 2” Color |
| Shock Sensor | Yes | Yes | Yes |
| Motion Detection | Yes | Yes | Yes |
| Max SD Card | 256 GB | 128 GB | 256 GB |
| Function buttons | 2 | 5 (F, Q), 4 (U) | 5 |
| Size (Front) | 119 mm wide, 36 mm diameter | 110 mm wide, 32 mm x 41 mm (F,Q), 64 mm x 111 mm x 32 mm (U) | 56 mm wide, 83 mm x 40 mm |
| Volts/Current | 12-24v, 400 mA | 12-24v, 290 mA | 5v, 3100 mA |
| Power, typical | 5.6 W | 4.1 W (F, Q), 5.1 W (U) | 15.5 W |
| Manual | User Manual 590W, User Manual 750S, User Manual 900S, User Manual 900X | F800 Pro User Manual, Q800PRO Manual, U1000 Manual | A129 manual |
| Released | Feb-2018 (590W), Sep-2017 (750S), Apr-2018 (900S), Oct-2020 (900X) | Sep-2017 (F800), Feb-2019 (Q800), Sep-2019 (U1000) | May-2019 |
Azdome M06
Larger than most, it offers 4K 24 fps recording. It has a 170-degree wide angle, f1.8 lens, GPS, and a 2.4″ LCD screen. The suction mount allows easy attachment/removal, but it is not discreet when attached. Released December-2018.
BlackVue DR490-2H
The 2 channel model looks similar to the DR650 and upgrades the rear camera to 1080p recording. Do not confuse the very similar model name DR490L-2H which is physically quite different, but also offers front and back 1080p resolution. No WiFi in either model. No internal GPS, but external GPS is an option. Announced in July 2017.
Note that there are gray market sellers, where BlackVue will not honor the warranty. Buy only from BlackVue or authorized resellers. USA resellers include The Dashcam Store and HDVD.
Vantrue X4
The X4 has 4K 30fps recording with an f1.8 160-degree wide-angle lens. It includes a larger 3″ LCD screen. The suction mount allows for easy attachment/removal. GPS is an option. Released March-2019.

Other power options (for all Dashcams) include:
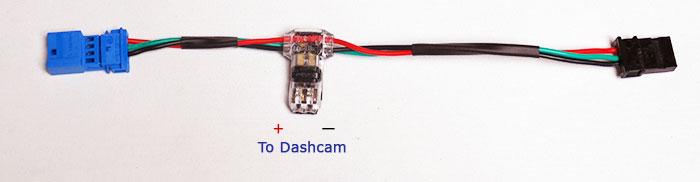
- You can tap into the wires with 20-24 gauge red Posi-Taps.
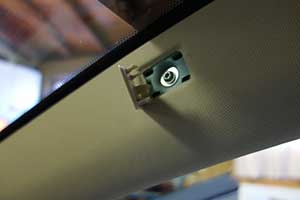
- If the connector is not attached to an intrusion module you can buy the mating connector – TE part 3-968696-2 along with two crimp pins 1-928918-1 (sold in a strip of 100).

For the Thinkware dashcams, you need to buy the 3-wire hardwire kit. The red and black power leads can be connected to power as shown above. The ACC yellow wire must be connected to a switched power source, so the Thnikware parking mode works. While we didn’t install this dashcam, others have found the Tesla rearview mirror uses switched power and you may want to tap into this connection.
The mirror switched power wire color has changed over time. For older cars, you need to Yellow/Dark Green wire. For cars built after Oct-2014, the wire color is just Yellow. We have not confirmed the color in AP2 cars, likely still Yellow.
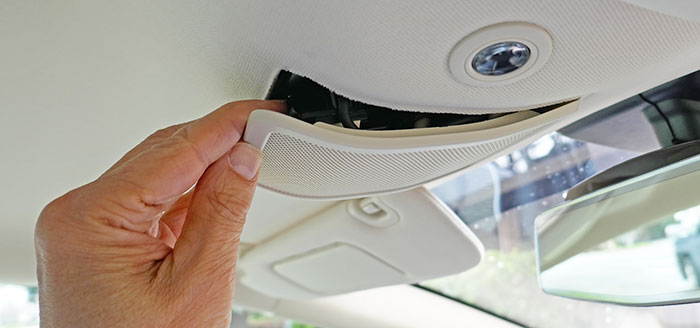
The mirror cable may be accessible from the microphone opening on pre-AP cars. It’s a separate bundle of wires, wrapped in black. With AP1 or AP2, you may need to disassemble the camera housing and locate the rear-view mirror connector and tap into the correct wire using a Posi-Tap. We recommend you first confirm it is a switched 12v power wire with a voltmeter. Otherwise, you may need to pull out a part of the headliner (quite difficult) to access the bundle of wires with the switched power.
Model X Power
We’ve not done a Model X install but can describe the power connections.
For always-on power, you’ll need to run wires up from the rearview mirror area up to the intrusion module’s 8 pin connector near the dome light. Use the black wire, pin 1 for ground, and the red-blue wire, pin 4 for power. Do not use the green data wire on pin 2.
For the Thinkware F800, you’ll also need switched power. You can tap into the 4-pin mirror power connector. Use the black wire, pin 1 for ground and use the red-blue wire, pin 3 for switched power. Do not use the green data wire on pin 2.
Model 3/Y Power
The model 3/Y uses an electronic fuse system, that if tapped into the wrong place, your dashcam will generate errors and problems! Tesla was nice enough to provide a separate 10 amp circuit that is electronically fused for 15 amps. It is not used for anything else, but it is switched power – meaning the power turns off when the car turns off. Use Video1 and Video 2 from Ingineerix to help connect to this power source in the cabin at the left footwell module.
Video Installation
Here’s how we installed a BlackVue DR900S front camera in a 2016 Model S in less than 4 minutes (ok, we made a few edits to cut out long pauses).


One simple enhancement is the installation of a circular polarizing filter (CPF) for your dashcam. This greatly reduces glare from windows and other cars. These are snap-on filters, so are easy to add. The filter will reduce the brightness slightly, so you may want to increase the exposure a few stops in the settings.
BlackVue – Filter for the 900S/900X Front, Filter for the 750S/750X Front The cost is about $35.
Thinkware – F800/Q800 Filter is about $25.
Viofo/SpyTec – A119 CFL is available for $15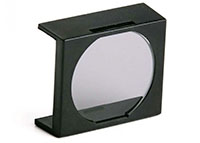
Viofo Snap-on CPL Filter

85 comments
Hello – I’m just waiting eagerly on your wiring adaptor to put in a Blackvue 900X plus. Ever since I got my front taken off by an Amazon Prime driver doing an illegal U turn (who then claimed it was my fault) I have been keen to provide some additional “insurance”.
I notice that there is, of course, a lot of hardwire in the box for an extended run which I won’t need as I have the always on power connector blue-taped in the right spot. In your experience, is there enough room behind the panel in the model S to hide the excess wire or is it better to cut the hardwire and shorten the length. I also see inline fuses for both the lead and yellow wire which add to the bulk.
Many thanks for your excellent articles here – they have been instrumental in helping me develop a plan of action.
Assuming your Model S was made in 2020 or older, yes there should be enough room in the headliner and in the microphone cover cavity for your cables and fuses. The headliner doesn’t have a lot of clearance, but you can stuff excess cable in there, just not a thick bundle. The fuses will likely need to be in the microphone cover area, which is not a problem. It’s real easy to snap open the microphone cover and take a look. Here are detailed instructions and pictures: https://teslatap.com/modifications/dashcam-power-cable/
Thanks for the quick response – I have an older Model S (2014) – does that make a huge difference? I have already opened the cover and it doesn’t seem like a lot of room but I did not think of the headliner as an option.
All the cars from 2012 to 2020 are the same as far as the headliner/cover. I’ve personally done a 2013 and 2016. I’ve stuffed excess cable in the headliner. Not a lot of room, but helps!
I have to disagree with your statement that Tesla’s dashcam is inferior. How can you beat having 4 cameras all the way around the car? Doing this with 4 commercial units, and running all the wiring, would be expensive, and a huge hassle, as well as a target for thieves. The real problem is that their s/w implementation is simply HORRIBLE. There is absolutely no good reason for the one hour limitation, but that’s no even the worst part. It erases the one hour of video while it’s parked! How stupid is that? Yes, you can honk the horn, or, even worse, tap on the dashcam icon, and select save — just what I’m going to be thinking about and remember to do in a serious accident, assuming I’m even conscious. Just can’t even imagine what they were thinking.
The Tesla dashcam is a great feature for free. It’s just not up to high-end dashcam standards, as you point out. In addition, the best dashcams automatically upload the video to the cloud, do not limit recording time, offer far higher resolution, and other useful features. Of course, you’d have to purchase and install such a dashcam, but I’ve never heard of a dashcam being stolen. The Tesla dashcam does offer 4 cameras, and you can view video in-car, which is nice. I’ve had an actual break-in, and the Tesla dashcam was unable to make the thief’s license plate readable that was 10 feet away. The 4K dashcam I also have was clear enough so I could pass the plate number to the police. So it’s not for everyone, but worthwhile to talk about the advantages and disadvantages of each solution.
Looking for a Blackvue but the new number has X in it rather than S. Not sure if it still has the connection plug for my 2015 MS AP1. Also ordering from Canada. Thanks for any info.
The Blackvue X series has three wires instead of two in the S series. The yellow and red wires are connected together for any EV (and we include a tap connector to do this). Its purpose is to not drain the 12v battery in an ICE car, so the dashcam is turned off when parked (not great). In an EV, you really don’t want the camera to be turned off, as it would run for years with the main battery keeping the 12v charged. The Dashcam power needs are minimal. More instructions and photos are included here for both two and three-wire dashcams: https://teslatap.com/modifications/dashcam-power-cable/
I a 2013 Model S and installed the BlackVue camera. When testing it everything seems to power fine, however when I closed the microphone compartment the camera powered down.
My current setup has a harness with an inline 5v fuse. I didn’t use the hardwire cables that came with the BlackVue because it had a yellow Acc+ wire that I wasn’t sure what to do with it. Do I need the online fuse? I tried changing to 3v and it still powered down. I keep going over your video and I see you use a fuse but it does give any details. Any help would be appreciated.
The latest BlackVue X series now includes three wires – ground, red and yellow (other models only needed two wires). In an EV, connect the red and yellow together, go through a fuse to the car’s 12v always-on connection in the headliner. Do not use Power Magic if it came with it, it’s for ICE cars that can’t support a dashcam power for longer periods without running down the 12v battery. It’s not an issue in an EV, which can run the dashcam for many months when parked without any concern. I’m not sure what the 3v connection you tried, but that will never work. You need the always-on 12v connection. If measured with a meter will be around 14v. It sounds like you tried to connect to a microphone, which does not have usable power.
Just a heads up – I just got my car back from Tesla Service. I have a 2015 Model S with AP1. I had a Blackvue Dashcam wired in using the unused intrusion sensor power connector in the headliner.
After my car updated to 2021.4.15, Autopilot stopped working with various error codes. After taking my car into service, they said that the field tech indicated that while the dashcam was plugged in to the power source in the headliner, the AP camera was not receiving enough voltage, hence the error codes and autopilot’s unavailability. Unplugging the dashcam from the power connector immediately resolved the issue.
I’m now trying to decide if I want to wire it into the fuse box, the OBD2 port, or sacrifice my 12V power for the dashcam 🙁
That’s a new one. Ok, the power in the headliner for the dashcam/intrusion detector is not on the same circuit as AP1. It’s on a 5 amp fuse, F21, for the alarm siren and optional intrusion module. It is powered on all the time.
The AP1 module (called the ParkAid ECU in the schematics), is only powered on when the ignition is on and goes through F21, a 10 amp fuse.
I can see no way for the dashcam power to have any effect on AP1. I expect there are at least 500 or so people using the F21 circuit for the dashcam, and I’m not aware of a single problem. I’ve used it myself in two cars now. That said, it’s easiest for a tech to blame any attachments for causing some problem. If you’re willing, I’d try reconnecting the dashcam power and see if any problems return. if not, great. If they do, I’m not sure what to think. Perhaps there is a cable in the headliner that is intermittent and any minor movement causes AP power problems. I hope you let me know what you find out.
That was my hunch all along – how could the Intrusion Detector interfere with the AP circuit?
Anyway, thank you for confirming my hunch with evidence. I went ahead and plugged it back in, went for a quick drive, and everything was working fine. 😐
Unfortunately the tech removed my wiring from the headliner, so I’ll have to do the hard part of feeding the power cable through out by the windshield again, but at least it’s working.
Hopefully this doesn’t happen again after my warranty expires. I’ve got ~1k miles left, and I’m still not driving much – I’ve only driven ~1500 this year.
Also, I guess I’ve learned my lesson – if this _does_ happen again, unplug and remove the dashcam before I take the car in for service 🙂
I’m installing a VanTrue into my 2014 AP1 model S using the tap in the microphone area as mentioned in the post above. I’ve got constant power verified by a volt meter but the camera won’t power on. When using the included cigarette outlet, camera powers right up. Cigarette cable has a small bulge (assumed to be in-line fuse) near the USB-C connector. I took apart the plug that goes into cigarette outlet to see if there wasn’t an in-line fuse if the bulge wasn’t an in-line and there’s nothing. Can’t figure out why the constant power source isn’t working. Any suggestions?
Turns out the bulge is the ferrite bead…
Some VanTrue models use 5v via a USB connection. If so, you’ll need to get a hardwire kit or a 12v to 5v converter. These should be small and fairly inexpensive. Also, check that you’re getting 13-14v at the power connection in the headliner. The data wire of the black connector and wires going into the two microphones may show some voltage, but they are not usable. The voltages on these lines are always far less than 12v and will not have enough current to power a dashcam.
In the Thinkware summary: “The Q800 … eliminates the annoying switched power needed in the F series.” This statement really got my attention. How is the Q800 wired, then? Does it use some other method (like stopped GPS) to go into parking mode? Thanks for clarification.
I was partly wrong. Ideally, you should use the hardwire kit with extra power. The Q800 does have an option to go into standby, and if the car is hit while parked, it powers up and records 20 seconds AFTER the event. In this mode, you only need a single power lead. I’ll update the text to make this clear.
I am a 2015 Tesla Model S owner. Considering the 70mai 1944p dashcam. What do you guys think?
We’ve not reviewed this camera, but it appears to have all the key features we recommend for Tesla owners. One ‘feature’ we don’t like is that it looks like it turns off after parking for 24 hours. This is necessary for ICE cars, but not for EVs with massive batteries. Still, the price is quite good and if this one downside is not a concern, it may be worth trying it out. When buying an SD card (not included) I would recommend a larger micro SD card, but it looks like 64 GB is the max.
I have purchased the recommended Transcend Flash Stick. It needs to be formatted to FAT32 but it does not give that as an option when I right click the drive it in to format it. I’ve tried on Windows 8 and Windows 10. How do I format this? All the cheaper flash drives I have default to FT32.
Windows has no means to format FAT32 beyond 32GB. Here is my step-by-step guide on how to do it with screenshots: https://teslatap.com/articles/tesla-dashcam/preparing-your-dashcam-drive/
Hi, thanks for this fantastic guide! I’ve installed a BlackVue 750S-2CH on my 2017 Model S and it seems to work perfectly (though the wire was barely long enough!)
I have a question about parking mode. Right now with your 4pin fan connector (no BlackVue magic), the power seems to be always on. Should I still have Parking Mode as ON in the BlackVue settings? What does it do that normal always-on recording doesn’t?
Finally, what LED settings to people prefer, front and back?
Congrats on the install! I enable automatic parking mode – this means when the vehicle is stationary for 5 minutes it only records when it sees motion. It will automatically exit parking mode when it detects the vehicle is in motion. Ignore all the dire warnings in the manual that you need Power-Magic. That’s for ICE cars, and is not needed or useful in an EV.
I set my security LEDs off. I prefer to not call attention to the cameras, but that’s just me.
Thank you very much for your site and detailed explanations and videos! I was able to follow your guide and installed a blackvue 900 about 6 months ago using the 4 pin fan connector. About 3 months in the camera would power down intermittently. I assumed it was a loose or faulty fan connector so ordered a new one and replaced it. It worked for a few more months and would power down but if I wiggled the connector it would turn back on and stay on; last week it stopped working entirely. I was very happy to come back to your site and see you had a kit for sale to assemble a great connector. I just received it today and assembled it (excellent instructions!). I plugged it in and dashcam won’t power up. The camera powers up with the cigarette lighter adapter so ruled out a faulty camera. I suspect it may be an issue with the Tesla power source. Here’s the noob question – how can I check that the connector in the car has power? Thanks again!
Thanks getting the dashcam kit. Sorry for the problems. Ok, if you have a meter, you can check power at the black Tesla connector. The outer two pins of the three should have 12 volts (may be closer to 14.5 volts, which is expected). If no voltage, the Tesla 5 amp ODB/Security fuse may have blown.
Several other things to check:
1) The inline fuse to the dashcam is fine?
2) Check that the wires are in the right locations. Use the photo: https://teslatap.com/wp-content/uploads/2019/01/Teslatap-dashcam-power-cable-connected.jpg and verify the black and red wires in the blue connector matches up with the black and red wires in the Tesla black connector. Next check the T connector that the red/back wires are correct (if the T connector was flipped, they would be backwards).
I hope that helps solve it.
Blown 5A fuse F100! It was fun to track down and even more fun to get to it. Also found disconnected hoses for what looks to be a drip pan that I was able to reattach hahaha. Thanks again for your help and for all of the valuable information, time and knowledge you freely share with all of us!
I’m installing the Viofo A129 and sharing my experience so far here https://teslamotorsclub.com/tmc/threads/installing-viofo-a129-dashcam-with-park-mode.132161/
I have a European Model S from August 2018 with the intrusion module. I discovered that the StarTech.com FAN4EXT12 cannot be used as a very clean way to not have to tap into the existing wiring as the connector cannot be plugged into the intrusion module.
I could tap into the 14V and GND leads but I don’t really like that approach.I’m now considering either to solder onto the connector pins as it seems the connector can be folded open or to have a lead go to the fuse box.
Does the Model S have an internal fuse box somewhere?
There is a fuse box on the left side in the driver’s footwell, behind the black plastic cover (for LHD cars, not sure about RHD cars in England). Many of the fuses are unpowered when the car is off, so you’ll need to find one that is always powered on. Sorry I can’t be of more detailed help. I’m actually working on a new connector that fits between the power to the intrusion module and the connector (i.e. no cuts or splices). It will be several weeks before I get all the parts as I may make a tiny PCB for part of the project and sell a completed assembly or a kit of parts. It could be 4 weeks before it’s ready, so the timing may not be great for you.
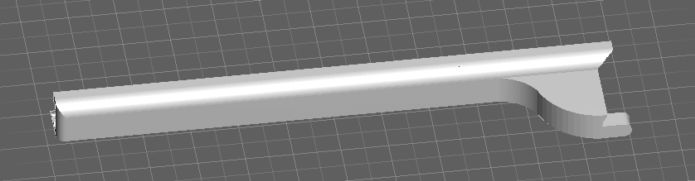
Thanks for the incredible installation post! Do you know of a source to purchase a wire cover V1 for the BlackVue installation? I don’t have access to a 3D printer.
Sorry, I don’t know of anyone making them for sale. You might consider hubs. They take an STL file and offer it to a range of people who have printers, and then send quotes back to you. I used the service a few years ago, and I thought the prices were reasonable and had a quick turnaround. Note the settings and material in the guide above, which you’ll want to include in your quote. Also, include that you want it in black.
Thanks!
I read every step of your installation guide and notice you took the path above the doors and pillars past the air bags to install the wire for the rear camera. I have a 2017 S with panoramic sunroof. It has a crevice along the edge that can possibly provide an alternate path from the front to the rear of the car. Do you see any problem with that solution?
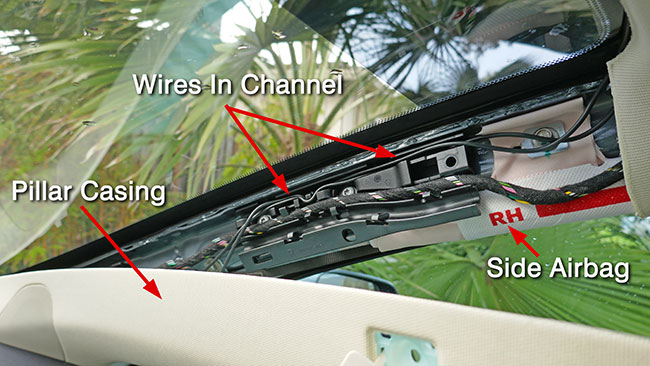
I’m not sure of the routing you’re considering, but it is really important to avoid interfering with the side curtain airbag deployment. When this airbag deploys, it pushes out the headliner and spreads downward. The airbag works the same on all roof versions – metal, glass and pano. It’s extra work to use the layout I suggest, but it avoids risk of the dashcam rear wire stopping the airbag from deploying. I don’t think the airbag is strong enough to cut through the wire. Another approach is to route under the floor sills, but it looks like it takes an extra 8 feet of cable or so.
Thanks. I found this You Tube video that better illustrates my point. At 9:39 minutes into the video it shows the path I’m describing.
https://www.youtube.com/watch?v=Inu8_32HLOo
Thanks for the visual. That approach looks safe to me as you’re above the airbag. I’ve seen a lot of videos where they route it in the seam of the side pillar (down several inches from the roof) which is not good. The approach from an open sunroof looks a lot easier too!
I completed my dash cam installation this week. I have to congratulate you on your agility with getting the grommet out between the body and trunk lid. Maybe because of the freezing cold I was unable to accomplish that step. So the alternative was to have a loop of exposed wire go between the ceiling of the car’s last trim panel to the liftgate center panel. I can get away with it aesthetically because I have a black car and the wire is also black. Maybe I’ll tackle rerouting into the grommet in the summer.
Hello,
I have read your Ultimate 2018 Tesla Dashcam on your site.
I am having a problem. I purchased my 2015 Model S in September 2015.
All worked fine until (I think) I had a BlackVue camera installed earlier this y=
ear. In short:
– I received a warning about my 12 volt battery being low in April. Tesla c=
ame to my house to change the battery.
– This past week, I received another warning about my 12 volt battery being=
low again.
My car is not driven daily, and it’s garaged. I have witness the times I have taken the trash out, the dashcam light is off, so I know it is not running all the time. There is an unknown:
– I do not know if the Power Magic add on was installed.
So what I have done is unplugged both dashcams and will plug it it when it’s in use. Tomorrow, Tesla will replace the battery. This weekend I will travel to the installer to see if the Power Magic was installed, if so, it need to be uninstalled. I will share your recommendations about NOT have the Power Magic installed. If that is the reason, can you tell me why it does not need to be installed?
Am I right about unplugging it as well?
Best,
Percell
The dashcam takes a trivial amount of power, about 300 mA. The main battery automatically charges the 12v battery when needed. If nothing else required power, the Dashcam should easily remain powered for a year or more if the car started out with a full charge!
When you get the 12v Battery Needs Service warning, it means the 12v battery is getting to the end of its life. Here’s a lot more about the 12v battery: https://teslatap.com/articles/12-volt-battery-compendium/
The reason to avoid PowerMagic is the car is draining and recharging the 12v battery 3-5 times a day. When the 12v battery gets low, PowerMagic turns off the dashcam. This means you loose recording when parked – a valuable feature of dashcams. PowerMagic doesn’t know the main battery is used to recharge the 12v battery in an EV. In an ICE car, the dashcam would drain the 12v battery in a few days and the car can’t be started. So PowerMagic is needed in an ICE car – but not an EV.
Anyway, there is no need to unplug it, even with the 12v warning. It will not help/hurt, but the warning does indicate the 12v battery is reaching the end of life and needs to be replaced in the next few weeks.
Excellent dashcam guide, but I have two questions:
– where did the fuse holder come from for the BlackVue 900- 2ch? I just receive mine and it has no fuse.
– the front camera installation video is unavailable?
Thanks
Mine came with the hardwire cable that ends with loose wires. It has the inline fuse. Perhaps you need to order it separately now? Just retested the front install video and it is working. You can also view it directly at: https://youtu.be/DX1AhLRiqto
Thanks for the YouTube link, that worked for me.
I’ve gotten the front camera installed. I didn’t add a fuse, I figured that if BlackVue is no longer providing one it may not really be needed; I hope I don’t one day regret the decision. One discrepancy is that the screw holding the A pillar cover in my May 2018 Model S is not a Torx, it’s a standard 5/16″ hex head tapping screw; no big deal.
So far so good with the rear camera install. Getting the covers off the B pillar was a rough. I’ve gotten the cable to the C pillar, tomorrow I’l do the routing through the hatch. One concern is that before I started routing the cable I plugged the rear camera into the front one and got a message on the phone app to check that the rear camera was connected. It was connected. Maybe I’ve got something wrong in my settings. I hope it’s that simple.
Thanks so much for your web site and the great information you’ve posted here. I couldn’t have done this installation without your help.
The car also has a fuse (15 amp) so it’s not supercritical if you went without an additional one. It’s more to protect the car than the dashcam. That said, I’ve never blown a fuse (in-car or accessory) in 30+ years of adding numerous accessories to cars over the years. Be aware if the car’s fuse does blow, the alarm system will be offline as it’s on the same circuit.
Yep, releasing all those snaps on the B pillar cover is hard! Glad you’re going the extra mile to do it right. So many just stuff it in the B-pillar seam where it’s going to hang up the curtain airbag.
I’d suggest having the power off on the front dashcam when connecting up the rear camera, then power up both together. Unlikely to harm anything if your sequence is difference, but the rear camera might only be detected during the front camera power-up.
Things are getting complicated. I’ve been unable to get the rear camera recognized. Worse, after about a week of operation the front camera no longer functions. I checked the voltage at the connection behind the microphone panel and the reading was – 3.25 volts. I’m wondering if the low voltage is what caused the rear camera to not be recognized, and if it also caused the front camera to fail after a week of operation? Or maybe it’s the other way around – whatever was wrong with the BlackVue camera setup has damaged the circuit in the car to cause the voltage to be about 1/4 of what it should be?
Your thoughts on this? Thanks for any suggestions you may have.
Any chance you’re connected to the center (pin 2) of the 4 pin connector? This is a LIN bus and does not have 12v of power. You should be connected to the outside two wires (details in the write up above). You might also check the voltages between each of the 3 wires, just in case the wires were inserted into the connector wrong at the factory (although I’ve never heard of this happening). One will be ground, one should have 12v, and the one not to use will have 3 volts or so (it’s actually a data line, not a voltage source).
If this wiring is right, then my next guess is the fuse for the circuit is blown. If blown, the alarm circuit will be dead. A quick test is to roll a front window down, close and lock the car from outside and keep the fob away from the car. Reach in and open the door from the inside handle. The alarm should go off – which means the fuse should be good. Use the fob to disable the alarm if it goes off.
Another test for both front/rear dashcam is to attach the cigarette lighter cord that came with the dashcam to the 12v. If this works, it at least ensures the cameras are working and the power source is the problem.
Turns out I was giving incomplete information, wish I could think faster and sooner. I got the 3.25 volt reading with the camera is plugged. Today I unplugged the camera and the reading is 12 volts when the circuit is open. Plug the camera back in and the reading dropped to 3.0 volts.
I will reconnect the cigarette lighter core that I cut off and try that, I will also test the alarm.
Thanks for putting up with my posts, after the problem is solved hopefully they will at least be helpful to others who run into trouble.
Thanks for the additional details. As you know, something is wrong if you’re getting 3 volts when connected. I’d expect it to blow the fuse if it dragged the 12v down to 3v. It sounds like a bad connection or perhaps the wire is not crimped properly in the Tesla connector (Tesla’s side not yours) and it can’t provide even a little current that the Dashcam requires. The 12v power port test should at least identify if the Dashcam is working or not.
Success. The vendor replaced both front and rear cameras since we couldn’t be sure which was the problem, but I believe it must have been the front one. Finished routing the coax cable through the hatch, turned out to be easier than I feared it would be. Your video was a life saver, never would have figured out how to do that otherwise and probably would have just run the cable exposed from the C pillar to the rear camera as other installation videos show it. Did have a bit of trouble avoiding the airbag at the C pillar, a bit more guidance at that location might be helpful to others – only after I’d already run the cable through the rubber tubing between the body and the hatch did I understand what I should have done back at the C pillar.
Mine was a grey 12V wire as well.
I would suggest that you film more on the C pillar as that confused me a little.
I didn’t use fish tape, however I used CAT6 cable – took a while though! On my Model S refresh mid-2016 AP1 model, routing the rear cable was difficult as there was lots of foam located in the cavities.
Nice video though, thanks for spending the time to make it, much appreciated! You are right, there was 1-2 inches left for the rear camera!!
Does anyone have a recommended installer in the SE of England (Cambridge area). I could do the Topfit install myself but the quality of image looks pretty poor. More complex hardwiring is beyond me.
I am considering a 4ch installation with cameras mounted on the front door triangle area. How do I run the wires to this area? Do I remove the interior door panels? Is there a grommet for me to run the wires from the front of the car to the interior of the door?
While I’ve not done a 4ch installation, you can remove the door panel (see this project, which has the step-by-step door panel removal: https://teslatap.com/modifications/projector-logo-lights/). I expect routing the wires through the flex door cable cover will be the most difficult part. Both sides are not easy to get to and there is not a lot of free space to run another cable. You may need to remove the connector so the wire is thinner and use wire lube.
I have had a BlackVue for a few months, and it’s time to hard wire.
However I only get 10v off the intrusion module connector. I found the connector taped to the back of the mic plate as expected but the wiring into the connector is different than described. I have 3 wires: Grey, Green/Red, Black. Green/Red is + and Black is ground. Grey seems to do nothing. Any suggestions?
Very odd – The Grey wire should have 12v (actually closer to 14v). The Green/Red is the LIN data bus and shouldn’t be used. If the Grey wire is dead, I wonder if the fuse for the alarm is missing or open. Roll down a window, close the car and lock it with the FOB. Then open the door by reaching in and pulling the inside handle. The Alarm should go off. If it doesn’t, there is something wrong with the alarm circuit (likely the fuse), which is the same power as connected to the grey wire in the connector. You can try and fix it yourself, but if you’re near Tesla service, they should fix it under warranty (i.e. the alarm doesn’t work). I’m fairly confident that once the alarm works, you’ll have power. Now if the alarm does work, and there is no power on the grey wire, it may be a disconnected or cut wire somewhere in the wiring harness (very hard to find). I’d at least try and tap into the grey wire before it goes into the connector (or probe it with a needle) as perhaps the connector crimp is bad. Let us know what you find out and good luck!
Hi! I purchased 2 Spytec A119 and was trying to install them on my X90D. I was planning to use the OBD-II port for constant 12V power, but it seems there’s no power on the port in my car. I found on another forum that some TMX owners had the same issue, seems it comes from a 5V fuse located close to the driver’s right foot. I was searching for support around me in France before stretching to try to reach the fuse, and thant’s when someone indicated that the OBD-II port is disconnected when the car is closed… do you confirm that ? Is it worth trying to replace the fuse for the OBD port or should I go another way for constant 12V ? Thanks for your help !
Sorry, I should have started by thanking you for this excellent and very detailed post, which is going to be very helpful when I start installing the dashcams… 🙂
In the past the ODB port has constant power on Teslas, so I suspect the fuse may be the issue. You may find another 12v source in the fuse panel, but you’ll need to confirm any choice is always on power. On the MS there have been open slots where you can insert a fuse and get power. Not elegant but a clean way to go. This older Dashcam article shows one way to do this (on the S): https://teslatap.com/modifications/dash-cam/ Sorry, but I don’t have a fuse map for the X, or I’d make a couple of suggestions as to what fuse to use.
Thanks for your answer, I’ll check the OBD fuse & keep you posted !
oh… before I go and put the fingers in the fuse box, how about this other way ?
Unlike the other dashcams, the A119 runs on 5V power & 400mA current (I guess that’s with the display on, so maybe even less with the screen saver ?). 2 dashcams running during 24hrs would use just a bit less than 20,000 mAh.
For 30$ I can easily buy a 30,000 mAh power bank that I could connect permanently to one of the USB ports in the central console. The power bank would be charging whenever I drive and providing ~36hrs of autonomy to the front & rear dashcams (seems more than enough as I wouldn’t be parking the car on the street for such a long time!!)
2 advantages : 1) easy to install and hide under the phone dock, and 2) it would avoid drawing current from the 12V battery while the car is parked.
I’d be happy to read your thoughts before proceeding… thanks !
That’s a clever solution. I don’t see any problems with it. Note that I have zero concerns about drawing power from the car’s 12v system while parked. If there was no other loads on the batteries, it would last more than 2 years on a full charge.
Hi,
Your solution with a powerbank is seducing. I am still wondering what is the best path for the powercable from the camera to the phone dock area. What is your choice for that? Thanks
William (Paris)
You’d go along the headliner, down one of the side pillars (see installation notes in the article above), then under the dash and/or under the carpet. If you have a console, you can pull off a side panel partly and thread a wire through the hole in the back of the console. See our Tshow project for more details on routnig a wire through the back of the console: https://teslatap.com/modifications/tshow-part-8-installation/. It’s a bit of a pain, but I’ve done it.
Thank you for your answer, I’m waiting for the hardware..
Ok, some updated news… The solution with the power bank works, but you have to take care about 2 things. First of all, your power bank needs to be able to deliver power to the dashcams AND be charged at the same time (not all of them can do that)…
But more importantly : you have to be spending a lot of time behind the wheel ! The power bank does not recharge that fast while driving, and in my case the ratio driving vs. parked is insufficient to recharge it fully.
I have finally tested the OBD port in my X90D, and I confirm that is is powered even when the car is locked or when you ask for a full power off from the main screen. My problem was coming from the OBD plug I purchased which was malfunctioning… I will get another one and still go with this solution.
JM69 – I have a 2015 model S and am thinking about getting the a119. I’m unclear about the battery drain. Have you had any issues with the 12v battery on your car? Also, will the a119 stay on for a certain number of hours (like 24) when the car is parked? Thanks.
The A119, like all external dashcams, takes a trivial amount of power. If nothing else was using power, it should run for a few years! The A119 will remain on as long as it has power (a good thing). The Tesla dashcam is quite different and requires a lot of electronics to remain on in the car, consuming about 1 mile of range per hour. The A119 uses about 100 times less power. Really the A119 is no concern at all. When I had the A119 I had it powered on all the time – including weeks sitting at the airport without charging one time.
Hi there,
I’m just considering the new Thinkware F800 for our facelift Model S with AP1, European intrusion detection package and solid roof. I was hoping to find a professional installer in my country, but to no avail. I am really afraid to do it myself, but your article at least gave me a some hope. It would be great if you could go into even more details.
Am I assuming right, that the mentioned mating connector – TE part 3-968696-2 is supposed to be put between the 4-pin plug and the intrusion detection module, for not having to use a Posi-Tap?
Not sure about the third wire of the 3-wire hardware kit for the Thinkware. Is it hard to find that switched power connection in that area? I can not see myself trying to pull out that part of the headliner, and I’m not sure how the camera or mirror housing can be dismantled without damaging it.
And then about getting in the wire from the front to the back for the rear camer. How is it possible to route the wire across the center of the headliner? It would be great if that part of the installation could be shown with more info and pictures.
Greetings,
Michael
Great that you’re thinking ahead! For Europe, the TE connector will not work as it is occupied by the intrusion detector. I’d recommend going with posi-taps. The third switched power line on the Thinkware is a slight pain (they really should redesign it like the BlackVue). On the older Model S, there is a wire in the mirror that can be tapped. On cars with Auto-pilot, the same wire is in the area, but very difficult to get too. I’d recommend running a wire to the passenger side fuse block (LHD cars, not sure on RHD). You pull out the sill to access these fuses. I’m sure one fuse would have switched power, but I’ve not tested it out.
I’ve been on some other projects and need to get back to a writeup on the rear wiring with pictures. Probably not until September.
I hope I did understand that correctly, that for a BlackVue dash cam without the PowerMagic you only need to tap two wires that are easily accessible from the intrusion module plug, so no third wire for switched power, right?
I’ve already given up on the Thinkware F800 again and will now be waiting for the successor of the BlackVue DR650S-2CH, which is known to be the DR750S-2CH and should become available shortly.
Out of curiosity, was it harder to do the rear wiring than the front installation?
Actually the Thinkware is the only dashcam I’m aware of that requires three wires. Most dashcams with two cameras power the rear from the front camera – so there is no additional power connection. You do have to run a wire from the front dashcam to the rear dashcam with the included cable. I’d say the rear is a bit more difficult as a proper installation needs to route the wire through the passenger side hatch flex tube.
As a newbie to dash cams and their installation I may be confused, but isn’t the third wire for switched power used for parking detection?
If the BlackVue and other dash cams with parking mode only require two wires (for permanent power), do they detect parking by motion sensor alone, and isn’t that less reliable?
Parking mode is a very important feature for me, and I have been told that especially cheaper dash cams have a less than mediocre parking mode functionality. Hopefully that’s not connected to two versus three wires power supply.
And one other thought:
Isn’t it that Thinkware has the hardwiring electronics included in their dash cams, however BlackVue uses the external PowerMagic box. So with the Thinkware you can not bypass it, but you recommend not using the PowerMagic in a Tesla because it will cause problems. How comes and what problems does it cause?
Other than the Thinkware, dashcams use video motion detection to decide if video should be retained. If the video doesn’t change, there is never a need to keep it (other than perhaps the first minute). If you’re parked, in most (but not all) the video is stationary and if there is motion (perhaps a thief) you want it recorded. If you are driving, there is clear motion and you’ll get a full recording. I’ve never understood the Thinkware design or why they force extra wiring – it’s the one area I dislike most about the Thinkware, an otherwise good choice.
PowerMagic is only designed to power off the dashcam when the 12v battery gets low. It has nothing to do with parking/driving states. PowerMagic makes sense in an ICE car, but is awful for an EV which can last for months with the trivial power use of a dashcam. The Tesla 12v battery may go through 2-5 discharge/charge cycles in a day. When the 12v battery gets low, the Tesla recharges it from the main battery. When low the PowerMagic could disconnect the dashcam, so that you have multiple periods of zero coverage.
Great information. I bought the TE part 3-968696-2 connector and pins for the front installation but haven’t picked the camera yet. I’ve put 20,000 trouble and care free miles in this amazing car, I think I’ve taken for granted the Farud Magnet these cars can be and hope I get the camera installed before it’s too late.
I don’t see running wires all through the car and plan on just installing a second one in the back. I hope you’ll be finding the time to post the rear install info and pictures. Does it use the same 4 pin connector? I like the fact you don’t have to tap into wires to install a camera and by just using an existing plug they can’t claim any breach of the cars systems or warrantee.
Tesla is finicky about everything only OEM and will jump at talking about voiding the warrantee. I don’t think it’s dire as they make it seem but they even freaked when I miunted unrecommended snow tires in the back.
Thanks again, hope you post the rear install info soon.
Still working on the rear dashcam documentation. A few other projects stacked up ahead of it!
Really not much concern about warranty issues. I’ve made many modifications to my Tesla and never had any issues. I did dent an aluminum trim part while taking photos. It was my fault and later I had Tesla replace the trim at my cost. If you brake something, clearly it would not be covered under warranty.
Great guide. Thanks for posting this. I went with the A119. A couple notes on my install:
I have one of the last APv1 cars (delivered August 2016) and the 12v wire on the intrusion module is grey (other wires are green and black).
If you are going with the A119, I would recommend 12v to 5v left-angle USB cord from Amazon. It’s considerably shorter than the one from WheelWitness so you have a lot less slack to deal with (and $5 cheaper).
Good find! I’ll change it in the article.
Any luck with the rear trunk side panel disassbly? “To get to the module, it is located on the passenger side, behind the trunk’s side panel. We are still preparing disassembly instructions and photos”. I’ve settled on the a119, to me resolution is everything.
I’ve been waiting for the rain to abate and got on a few other projects meanwhile. I hope to get back to it next month. Sorry for the delay.
I installed a Viofo A119 on the front using your guide last year, but the one I bought for the rear is still in it’s box. I read somewhere in TMC that there is an always on connector near the tail light, but a how-to guide on how to access it and how to route the power cable would definitely be appreciated. Thanks for all your work!
There is always on power at the lifegate module. Just before this section I describe it a bit more: https://teslatap.com/articles/ultimate-tesla-dashcam-guide/#setup It’s a bit of a pain to get to and I haven’t needed to do it (hence, no write up yet).
How hard is it to hard wire the Viofo/spytech a119 to the speaker over the mirror. They offer a Dash Cam Hardwire + Fuse Kit – Mini USB
I don’t know how old your car is, but it’s simple to check if you have the intrusion module connector or not. Just open up the microphone panel (pull down from back) and check if the 4-pin connector is taped down or attached to a module in the center. If you have the connector, installation is a snap (follow our instructions). I don’t know what hardware kit you’re looking at. The key to be sure it doesn’t have the low power down feature required for ICE cars. There is a link in this article for a hardware kit to convert 12v to 5v with the correct USB connector needed for the A119. It’s the one I used and it has been working fine.
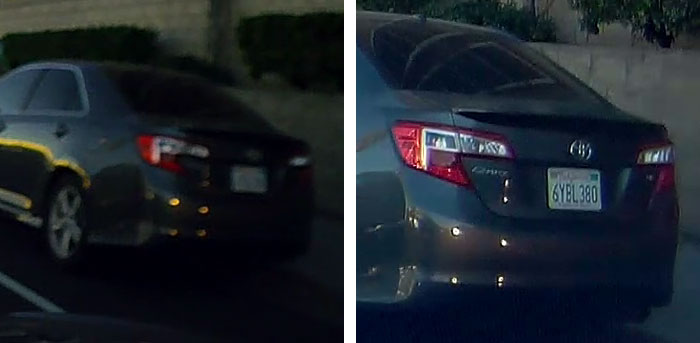
Apologies, I must have misread your statements above from the pictures, it appears the blackvue can’t see the license plate on the right side of the car but the 119 can. So, I assumed that the resolution just wasn’t enough on the blackvue to make it legible. Thanks again for the great article / comparison.
Does the thinkware, have the same issue with not being able to show license plates?
I’m not sure it’s fair to say 1080p cameras like the Thinkware F770 can’t read license plates. It just means they can’t read them if they too far away, while a higher resolution dashcam may be able to read it. A 720p dashcam would be even worse than a 1080p camera. For example, if you’re 5 feet directly behind a car all 1080p dashcams can capture video that should make plates readable. As the plate gets further away, it becomes too blurry to read. Sorry I don’t have an actual distance – I may try and test it out!