You’ll need to properly format and add a folder to start using your new drive.
You can format and set up the drive from the car. With the drive inserted and no other connections to the other USB ports, select Controls > Safety, and under Dashcam, then Format USB Drive. You may have to scroll the screen up to see the Dashcam options.
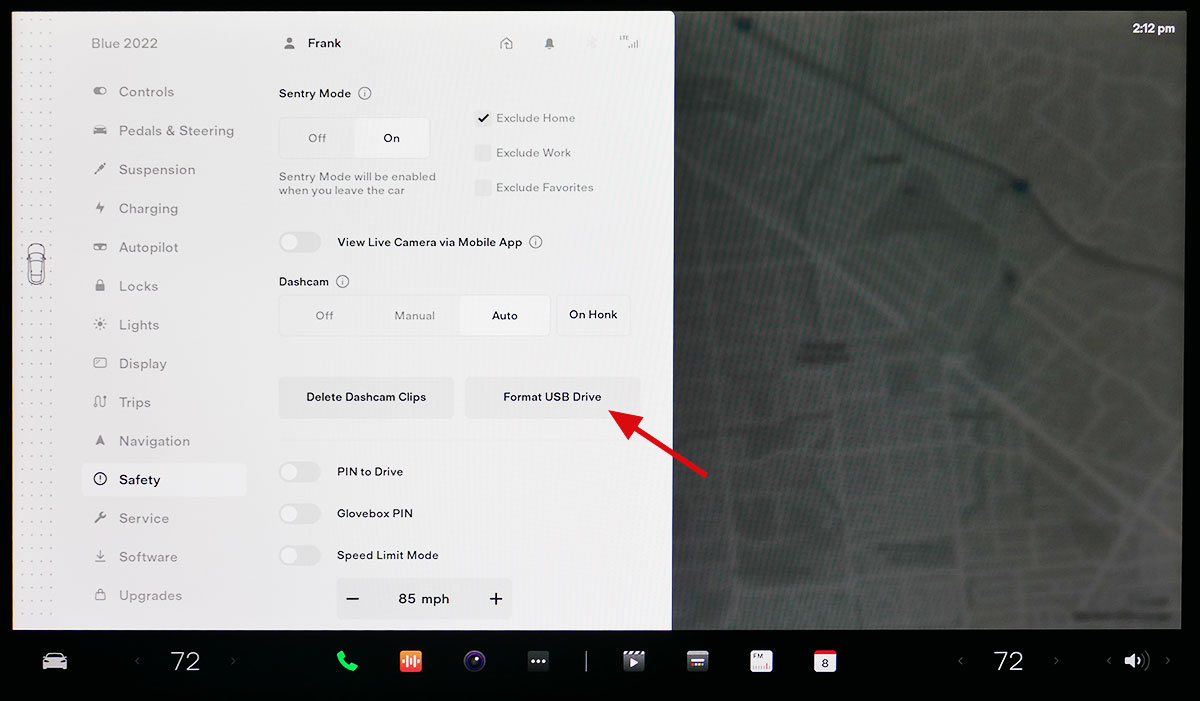
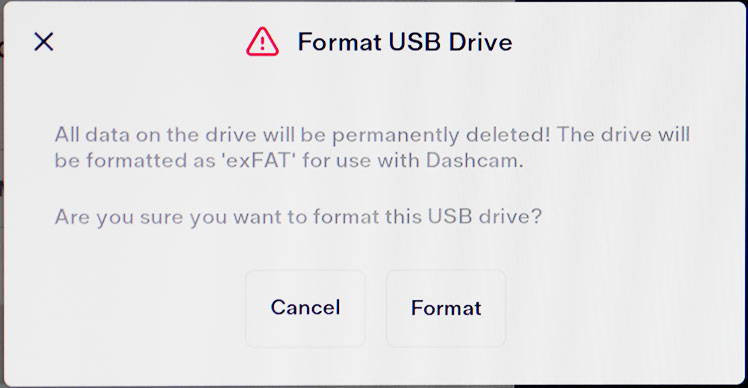
A format erases the drive contents, formats, and inserts the necessary folder for the dashcam feature.
You can also use a PC or Mac with the following step-by-step process to get the drive properly set up.
Most drives, 32 GB and under, are pre-formatted for FAT32. Larger drives may be FAT32, exFAT, or NTFS. Only drives that are formatted for FAT32, exFAT, or Linux ext4 can be seen by our cars. If it is NTFS, you’ll need to reformat it (which erases all the data on the flash drive).
Windows
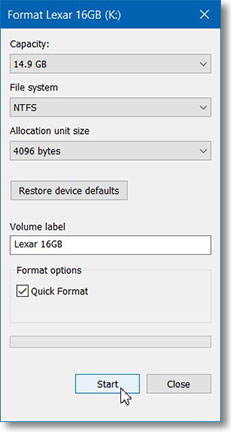
Formatting with Windows (option 1)
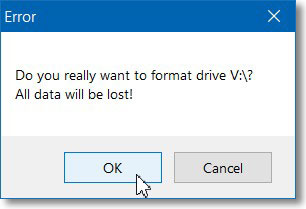
With Windows on drives at or under 32 GB, open Explorer. In the left pane, right-click on the USB drive and select Format. BE ABSOLUTELY SURE you selected the USB flash drive and not another hard disk. Set the File system to FAT32 and click Start.
Formatting with GUIformat (option 2)
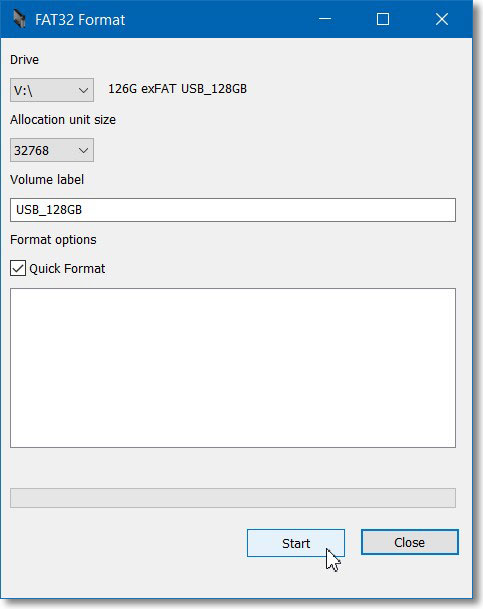
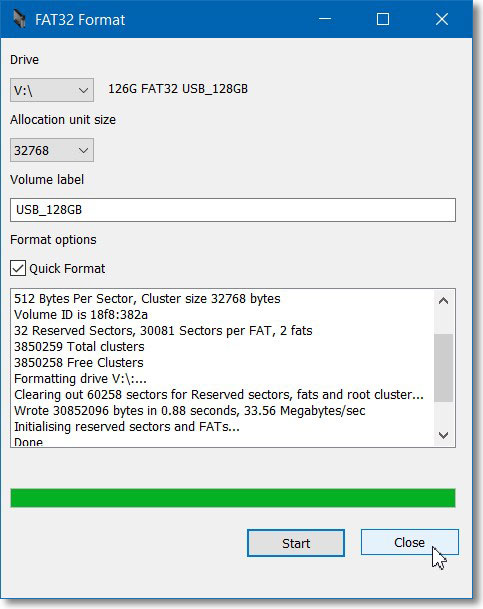
For drives larger than 32 GB, to use FAT32 (not exFAT) you’ll need a third-party utility since Windows doesn’t allow formatting FAT32. One free product we like is GUIformat, which is really simple. Click on the image on the web page to download the program. Run guiformat.exe (there is no installation).
Formatting with RMPrep (option 3)
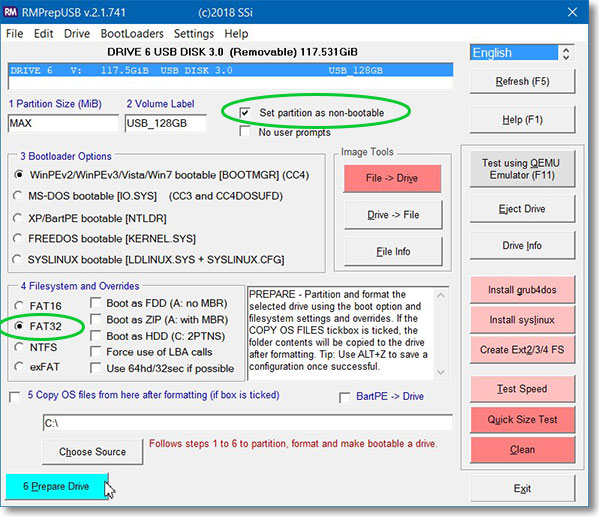
You can also use the free RMPrep program we use to test fake drives to also reformat the drive. Using RMPrep, with the flash drive selected, check the box “Set partition as non-bootable” and in section 4, select FAT32. Then click on the teal button “6 Prepare Drive“.
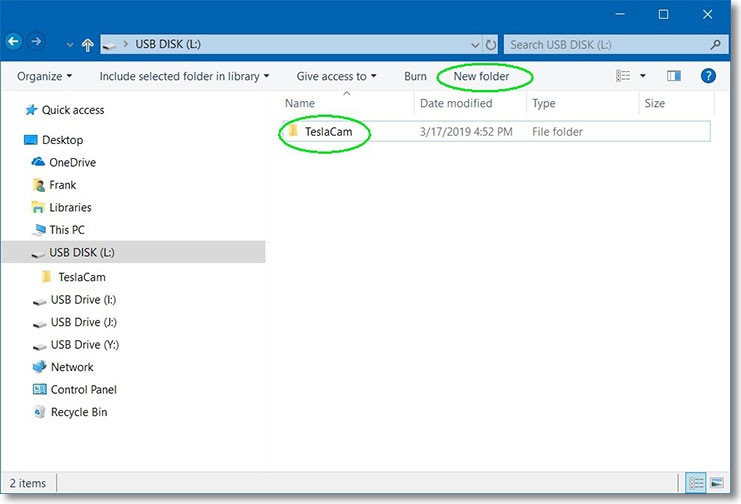
Create the TeslaCam Folder
After formatting the drive, create a folder with this exact name “TeslaCam”. For example, in Windows, open Explorer on the folder and click on New Folder, and set the name.
Macintosh
Formatting on a Mac
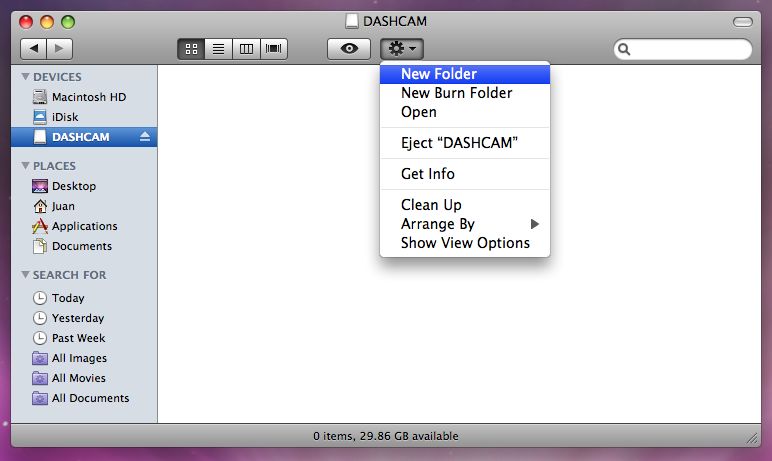
Open Finder, search for Disk Utility and select.
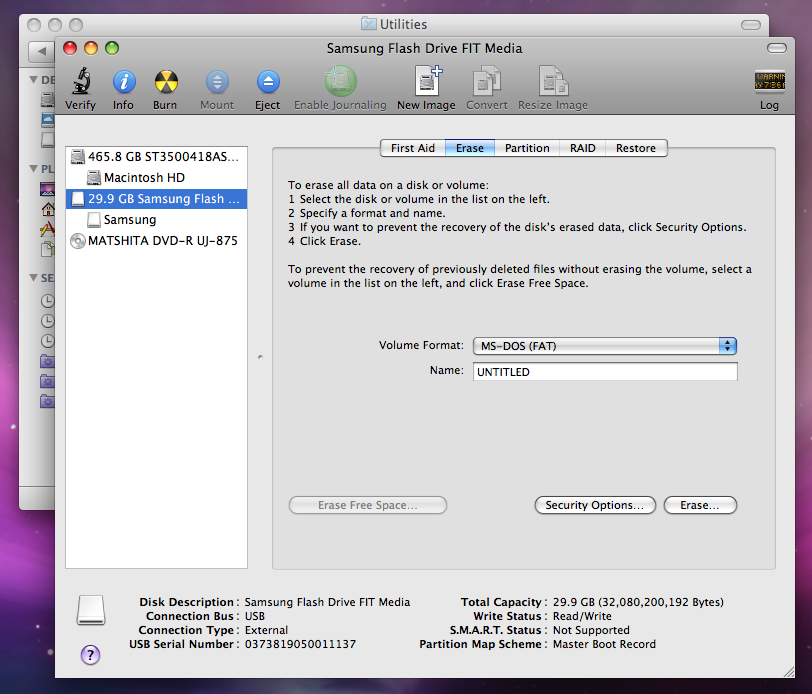
On the left pane, select your flash drive. Be absolutely sure you’ve selected your flash drive and not the hard disk! Click the Erase tab to identify the current format. If not “MS-DOS (FAT)”, Select MS-DOS (FAT) as the format. Note that Apple makes it a bit confusing as “MS-DOS (FAT)” is really Windows FAT32.
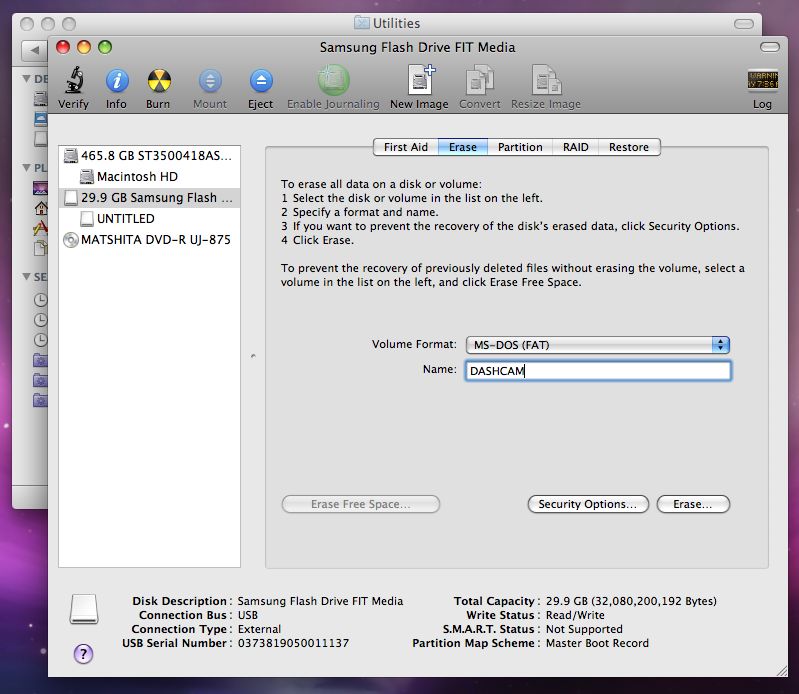
While not required, you may want to set the volume name. Anything you want is fine. Click on the lower Erase… button and a confirmation dialog appears.
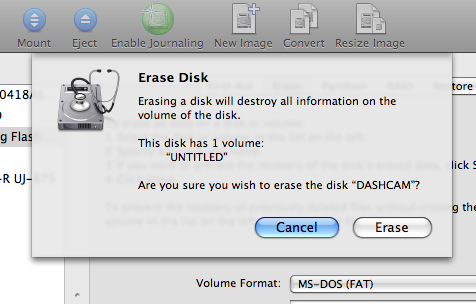
Click the Erase button and the format begins.
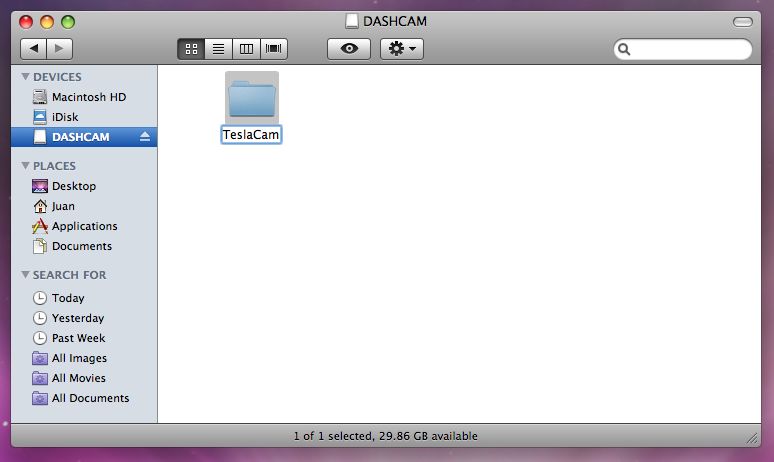
Create the TeslaCam Folder
The last step is to create the TeslaCam folder.
Partitioning
While Tesla does not officially support music and recording dashcam video on the same drive, it can be done by creating two partitions on the drive. The process is not simple, and I’m not sure it’s worth the trouble, but if you need to use one USB port for your phone, that only leaves one port for USB music and dashcam video. SomeJoe7777 has made a good partitioning tutorial on TMC.
One downside of this approach is when a drive failure occurs at some point due to dashcam longevity issues. Depending on how the drive fails, it may take your music collection along with it.
(Jan-2022 update)