1 – 3D printed box and cover
1 – Tshow remote PCB, 0.0625” thick (zip file, Gerber)
1 – Strip of 5 NeoPixels (from leftovers of the 144-pixel strip), without silicone cover
1 – 33 uf, 10V tantalum capacitor (value not critical, but the size is)
1 – 120 ohm, 1/4W resistor (not shown in parts image)
1 – RJ12 Jack, 6 conductors, low profile (a lot of 5)
1 – PCB mount 6mm push button (2-wire), 6mm long shaft
1 – IC – 76176AP differential transceiver
9 – 10mm x 1mm round magnets (typically sold in a lot of 25)
1 – Polycarbonate, 0.062″ thick, 50% transparency (scrap from earlier)*
1 – Plastic diffuser (see text)*
2 – #2 ¼” flat wood screws*
* Not required for improved version 2 design
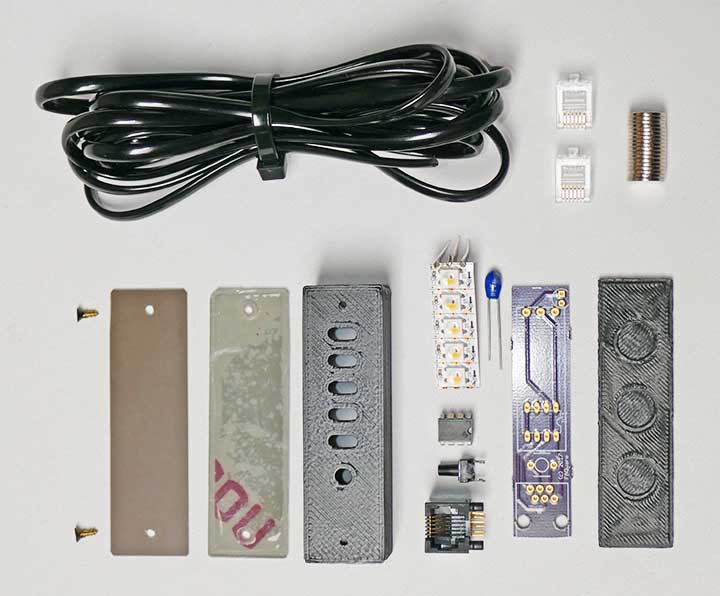
Remote parts (version 1)
The wired remote control allows you to see the current selection and force state changes or turn the display off from within the car. It is mounted in the cabin, such as the center console. This unit is optional and is not necessary for normal operation.
The remote control is a simple unit that has some electronics, a 5-NeoPixel strip, a pushbutton, all enclosed in a 3D printed box. Assemble and solder the components to the PCB. The NeoPixel strip has 3 thin wires soldered to the input end of the strip. It fits up about 1/4″ on top of the IC, U1. Some tweaking may be necessary so the pixels line up between the 3D box dividers.
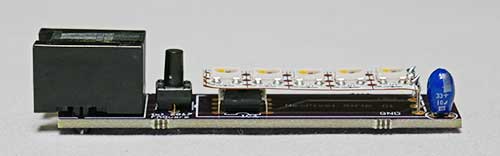
Side view of assembled PCB
For my first 3D printed box, I went with an outside service using 3dHubs. Skip this historical section and go below to see the improved version 2 which is far easier to build.
The 3D printed needed some filing to fit properly, depending on how good the 3D print is. I also had some pinholes in the front that I sealed with black silicone. I then painted the top with satin black paint (probably unnecessary). Later I’ll use two #2 ¼” flat wood screws to hold down the polycarbonate cover. I painted these screws’ heads black as well.
From more scrap Polycarbonate, I cut a rectangular top, 2-7/8” x 13/16”. I also had some frosted polycarbonate 0.016” film that I cut to the same size as a diffuser. Clamping all three together, I drilled two holes at each end 3/16” from the end on the centerline with a 1/16” drill.
Unclamping the 3 parts, and then clamped the polycarbonate and the diffuser together, carefully keeping them aligned, with the thicker polycarbonate on top. I enlarged the two holes with a 3/32” drill and then countersunk the two holes. Now the two polycarbonate layers can be screwed to the box with the two painted #2 wood screws.
Next, you need a button that extends through a hole (not yet drilled). I tried to get some buttons from China, but they were lost in shipping after 8 weeks. I switched gears and made my own button using an old T-1 ¾ LED. Any color will do, but ones with thin leads that go into the plastic LED base are better. With the box face-down and film and polycarbonate layers attached, clamp it to a woodblock, the existing pushbutton hole in the 3D box is too small. Drill it with an 11/64” drill and file/drill as needed further so the LED slides in and out smoothly without binding.
The button height depends on the push button and PCB placement. For my assembly, I needed about .9” more than the base of the LED, so used a fiber washer and cut out a small round part of a scrap PCB that had two plated through holes spaced 0.1” apart. I soldered the LED to the board and filed it down so the bottom was flat. I also filed the PCB conform to the outside of the LED. It took two tries to get the spacing right, so when assembled, pushing on the LED top activated the pushbutton.
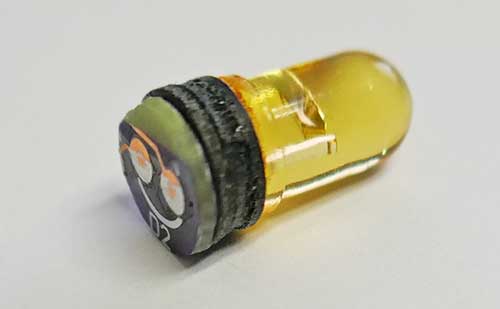
Button made from LED
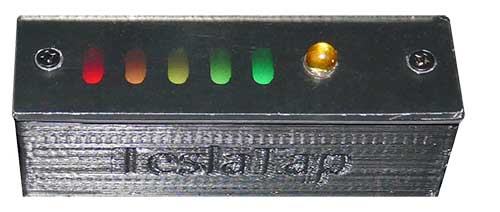
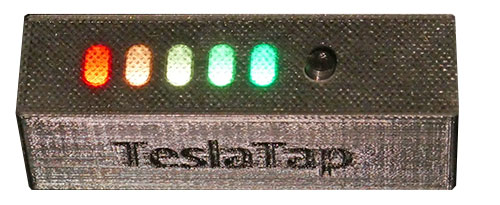
Finished version 1 remote (with power)
In the photo above, the “LED” push button only looks like it is illuminated due to the camera flash.
I was never really happy with the version 1 design and after I got my own 3D printer, I improved the design with a new box design. The first 5 layers were made with PETG transparent black and the rest with PETG black filament. This eliminates the paint, the two covers, and screws. It is also a lot cleaner looking. I also 3D printed a button rather than all the handwork to make the button out of an LED.
Improved Remote
Print the box using 3dHubs, a printing service, or on your 3D printer. Here are the 3 STL files needed to make the latest version. These work best on a printer that doesn’t require a raft. No support is needed on these parts. A layer height of 200 μm or less should work well. The button was printed using 100 μm layers in black, but another color would make it stand out more.
The lid has spaces for three 10mm diameter x 1mm thick magnets. I epoxied these to the lid. Be sure all three are in the same magnetic orientation! Later, you’ll attach additional magnets to the console to hold the remote-control unit. I’m sure there are many other ways this could be done, such as with screws or Velcro.
I placed a thin sheet of scrap plastic 2.5” x 5/8” from a discarded blister pack along the bottom of the PCB. This avoids any shorts between the PCB and the metal magnets. Slide the lid with the magnets into place.
4 comments
Having issues finding a decent priced roll of any size of PETG transparent black. Most seem to come from outside the U.S., with a way more than the product shipping cost. As this is the only use I have had for this interesting filament, don’t want to get sizable quantities which may justify the shipping cost. Where did you get your filament from? Maybe your source for this stuff is still around, and I just haven’t found them?
I had to order it from the UK, and the shipping was as much as the reel! I’d suggest getting some clear PETG filament instead, which is fairly easy to get in the USA with free shipping.
Am I missing a link to the Tshow remote PCB, 0.0625” thick to be sent to one’s favourite PCB board fabricator?
Now included in the parts list.