The version 6 assembled unit looks similar to this:
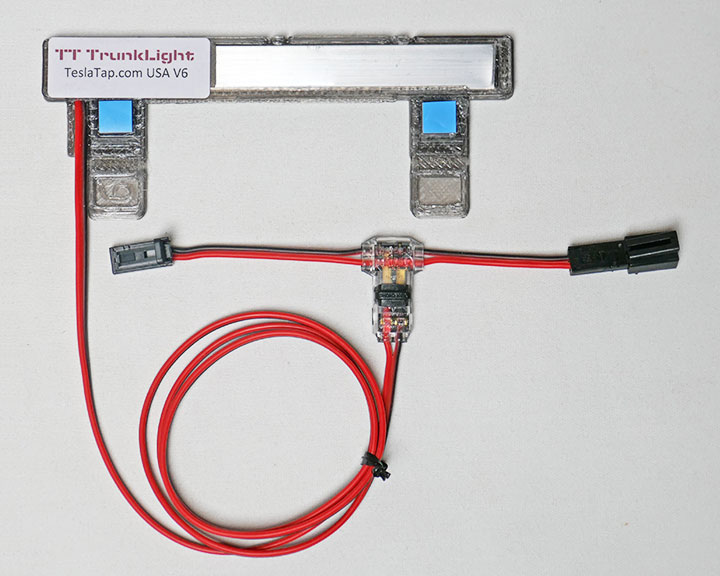
TT Trunklight assembly
First, confirm you have the black plastic cover on the top of the trunk area. In the photo below, it shows the view looking up from the trunk. The cover runs from the rubber trunk seal back a few inches towards the rear seat and the full width of the trunk opening.
Some very early Model 3s built in Q1-2018 and older do not have the black plastic cover. If this is the case, we suggest you ask Tesla service to order and install the cover for you. Other customers have had Tesla do this at no cost.
On the TT TrunkLight grey plastic assembly, remove the blue paper from the double-stick tape.
Slide the grey plastic TT LED assembly into the upper center trunk under black plastic cover, while tilting so the adhesive pads don’t adhere yet. The edge of the black cover should fit into the groove on the TrunkLight. Press the TrunkLight so the adhesive pads adhere to the top of the trunk.
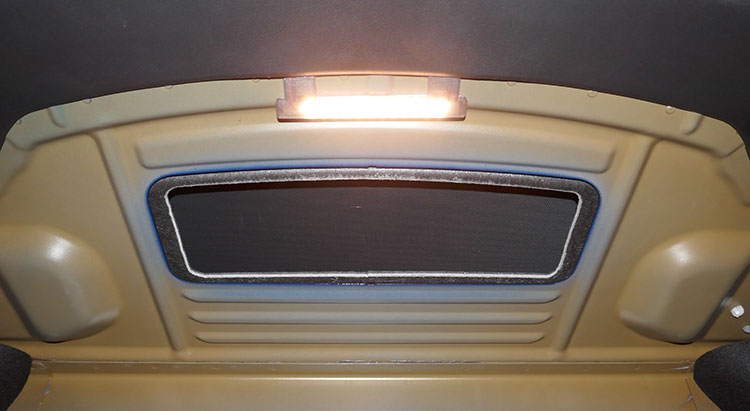 Looking upwards from trunk floor with the TT LED assembly installed
In the trunk on the driver’s side, pop out the existing LED module. It’s often easiest to do this by reaching your hand behind the module and pushing it out. Disconnect the module. It has a tiny latch that must be depressed before the connector slides out from the LED module.
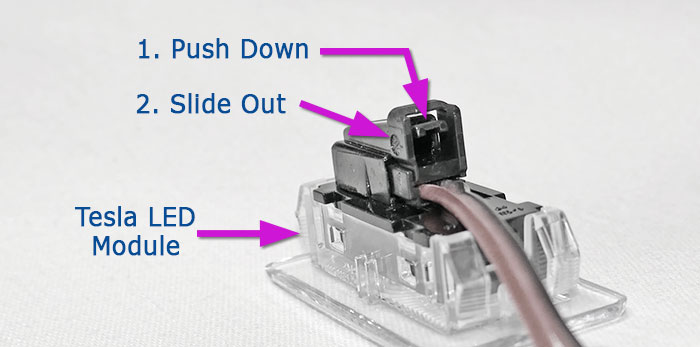
Closeup View of Tesla LED Module Connector
Route the wire from the our TT TrunkLight behind the black cover over to the Tesla LED module hole and poke the wires with connectors through the black rectangular plastic plate and out of the hole. Connect it to the wiring harness and the LED module. The connectors are polarized and only fit one way.
Confirm it is working. Depending on how long the trunk is open, the software may disconnect the power to the lights. If this occurs, just close the trunk and reopen it and power will be restored to the lights.
Insert the Tesla LED module back into the opening so that it snaps into the black plastic rectangular plate. Again, this is easier to do by putting one hand around to the back of the mounting hole and holding the plate while you push from the front.
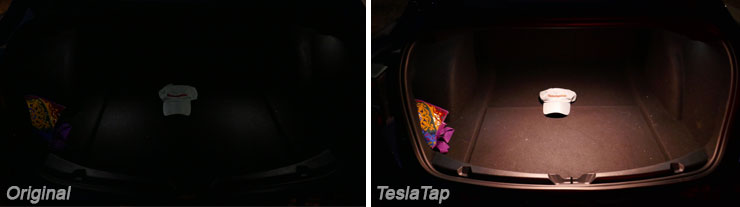
Comparing the Original Tesla LEDs and with the TT TrunkLight
That’s it! Thanks for getting the TT TrunkLight! If you want to see what goes into making the TT Trunklight, we’ve created step-by-step instructions!
If you have any issues or questions, open a ticket. We’re happy to help. If you like your new TT TrunkLight, we’d love to have you to make a comment in the Tesla forum.