Created by our guest contributor Steven Barnes.
The Model S footwell cover is a perfect size – until you try to move it up out of the way. It’s just a little too wide to lay flat in the bottom of the trunk.
I use the footwell regularly, but the footwell cover is in my way and usually falls on me when I am trying to put stuff in the footwell. Well, (pun) I found a fix. I mounted a pair of aluminum channels beneath the parcel shelf on the parcel shelf brackets. Now, I can slide my footwell cover into the grooves of the channels parallel and beneath the parcel shelf. It stores easily there either temporarily or permanently.
Before I go any further, let me explain that I am calling these new mounts “channels”. There are instances in the instructions below where I need to refer to the parcel shelf bracket. I don’t want to confuse these channels from the parcel shelf brackets. So, I call these channels.
These are simple and not exactly pretty. I wish someone would take this idea and print them in hard plastic and send me a pair for the idea! It would be even better if Tesla would design a version of the parcel shelf bracket that included this channel. We could retrofit our current Model S’s with a replacement bracket that included the channels. But until they do, this does the job!
- 2-each flat 1 1/2” x 1/8” x 10” pieces of aluminum
- 2-each flat 57/64” x 9/16” x 1/16” x 10” aluminum channel
- 8-each #10-24 x 5/8” screws and nuts
- 1 can black spray glossy paint
- Needlenose pliers
- Flat tip screwdriver
- Tape or 12-inch ruler
- Hacksaw
- Metal file
- Drill and 5/16th drill bit
I took two 10” pieces of aluminum channel and two 10” pieces of flat aluminum stock and drilled two holes about 1 ½ inches from the end and attached them together. I aligned the channel and flat pieces so they were even with the open side of the channel piece.
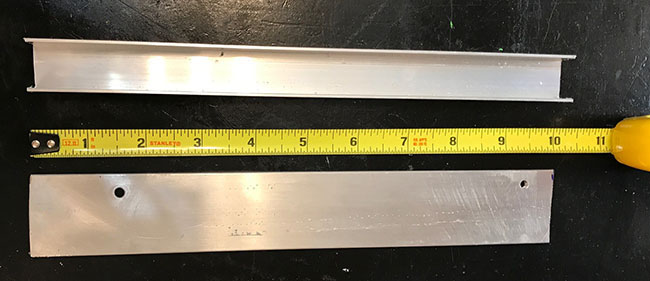
10 inch flat and channel aluminum stock
Freshly cut flat and channel stock
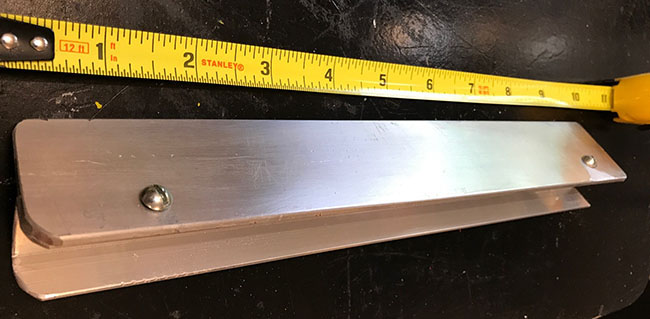
Two pieces attached with screw and nut after rounding ends with file
Assembled underside of each side
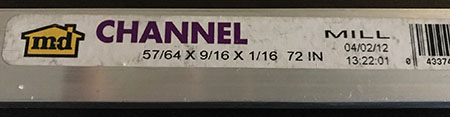
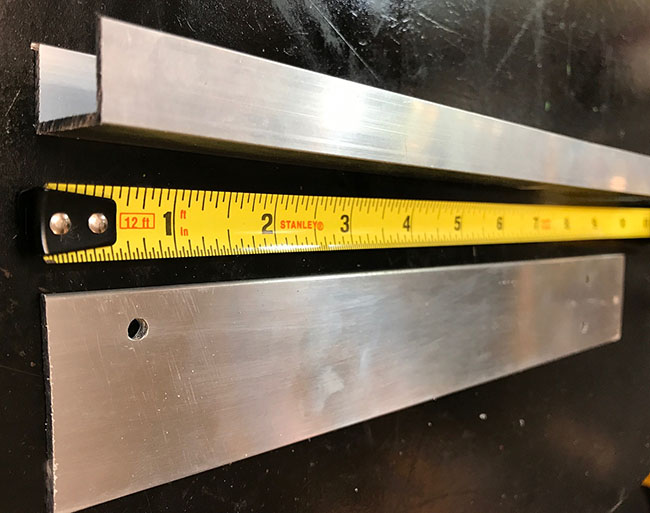
Specs on channel stock
I used a file to shape and match the sharp edges of both ends down to round corners. The degree that you use to reshape the sharp ends to rounded corners is up to you.

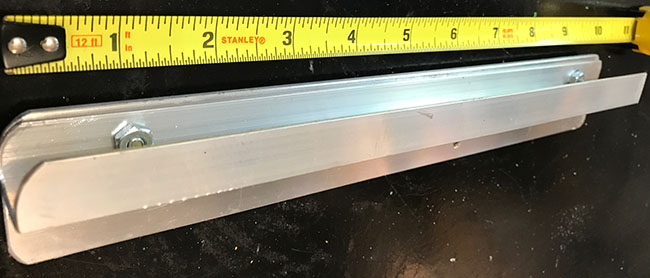
Completed pair of Channels before being painted
Once I have the ends rounded, I disassembled the two pieces again to paint them. I used blue painters tape to cover the inside groove of the channel because the rubbing of the cover will rub the paint off later. I decided I might as well just leave the groove unpainted. After the first layer of paint, I assembled the flat and channel, with the screw and nut. Another coat of paint. Let it dry overnight.
Remove and store the parcel shelf out of the way. This will be reinstalled later.
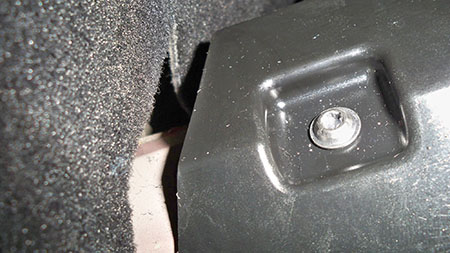
Torx T20 screw on the parcel shelf bracket
Remove the Torx T20 screw under the parcel shelf bracket on each side
Then from the end closest to the back of the car, pull the corner out from the car towards the center of the trunk. You are pulling it from under the curl of the edge of the trunk’s weatherstrip so give it a good pull. You will hear it pop as it clears the first flat clip. Pull more as you “walk” it pulling from the inside of the car. As you get close to the cloth trim above the bracket, hold the cloth trim in place so you don’t pull it off the car with the bracket. Continue pulling the bracket at the C pillar.
Now that the parcel shelf bracket is removed, place it on a flat surface to mark where the footwell cover channel will be attached. I didn’t want mine flush with the front of the parcel shelf bracket. Instead of aligning the bracket with the front, of the parcel shelf bracket, I used the other side. I aligned the Channel just before the opening where the notches on the parcel shelf slip into the bracket.
Practice placement of the channel until you are comfortable with what’s going to work best for you. Remember the footwell cover is approximately the same width as the parcel shelf. Use a cardboard box or second set of hands to practice aligning the footwell cover with channels on each side to estimate where you want to mount the channel to the bracket.
In the picture below, you can see where the channel is aligned to the edge of the parcel shelf bracket and about 4 inches from the front of the bracket.
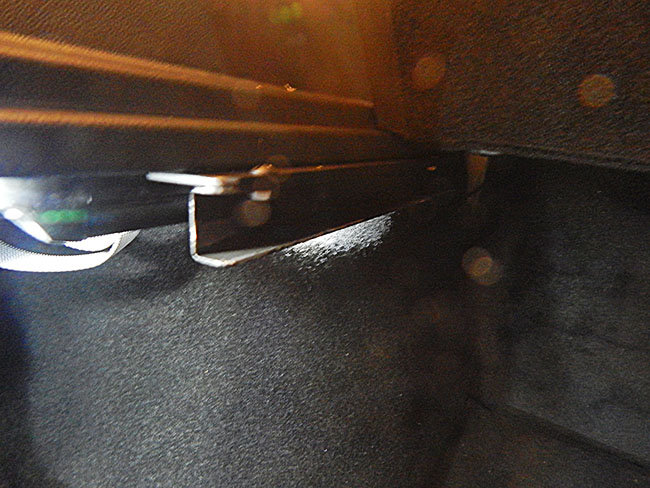
Footwell cover channel mounted on parcel shelf bracket
In the picture below you can see the footwell cover channel and its position relative to its distance from the end of the parcel shelf bracket end.
When the liftgate is closed and the parcel shelf folds flat, there is a three-quarter-inch gap between the parcel shelf and the top of the footwell cover.
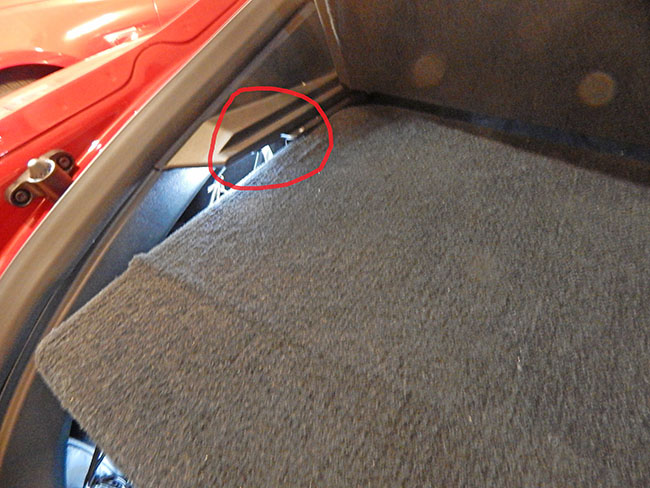
Footwell cover partially inserted in channels
The red circle shows where the footwell is supported by the new aluminum channel. It is not fully pushed into place. (This parcel Shelf Bracket has two LED mounted LED, another of our projects!)
The footwell can be left in the channels while driving, or used as a temporary holding spot when loading items in the well.