The FootWarmer module redirects some heated airflow in the driver’s footwell to the right foot. The current footwell vent directs heated air primarily to the left footwell area. While our FootWarmer will not create instantaneous heat, it is noticeably more comfortable as you drive in the cold.
The FootWarmer only works for the Refreshed Model S (April 2016 through December 2020). It does not fit in the older classic Model S. The newest Model S Plaid/LR (made after January-2021) and the Model X/3/Y uses a different airflow that appears to distribute the airflow more evenly to the feet. Our FootWarmer installs in less than a minute and only requires a Phillips screwdriver to lock the module into place. No cuts or modifications are required to your Tesla and it can be removed at any time.
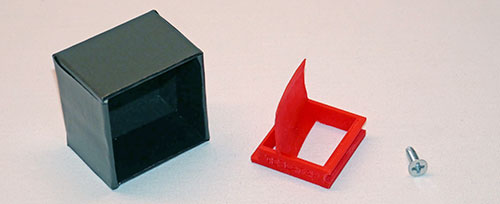
FootWarmer Module (red) with locking screw
The following two-minute time-lapse shows a shoe on the accelerator getting a 10-degree rise over a 2-minute period. No foot was in the shoe to avoid skewing the results with body heat. The fan was set at 8, and airflow directed to the feet. Without the Footwarmer insert, almost no heat appeared on the shoe.
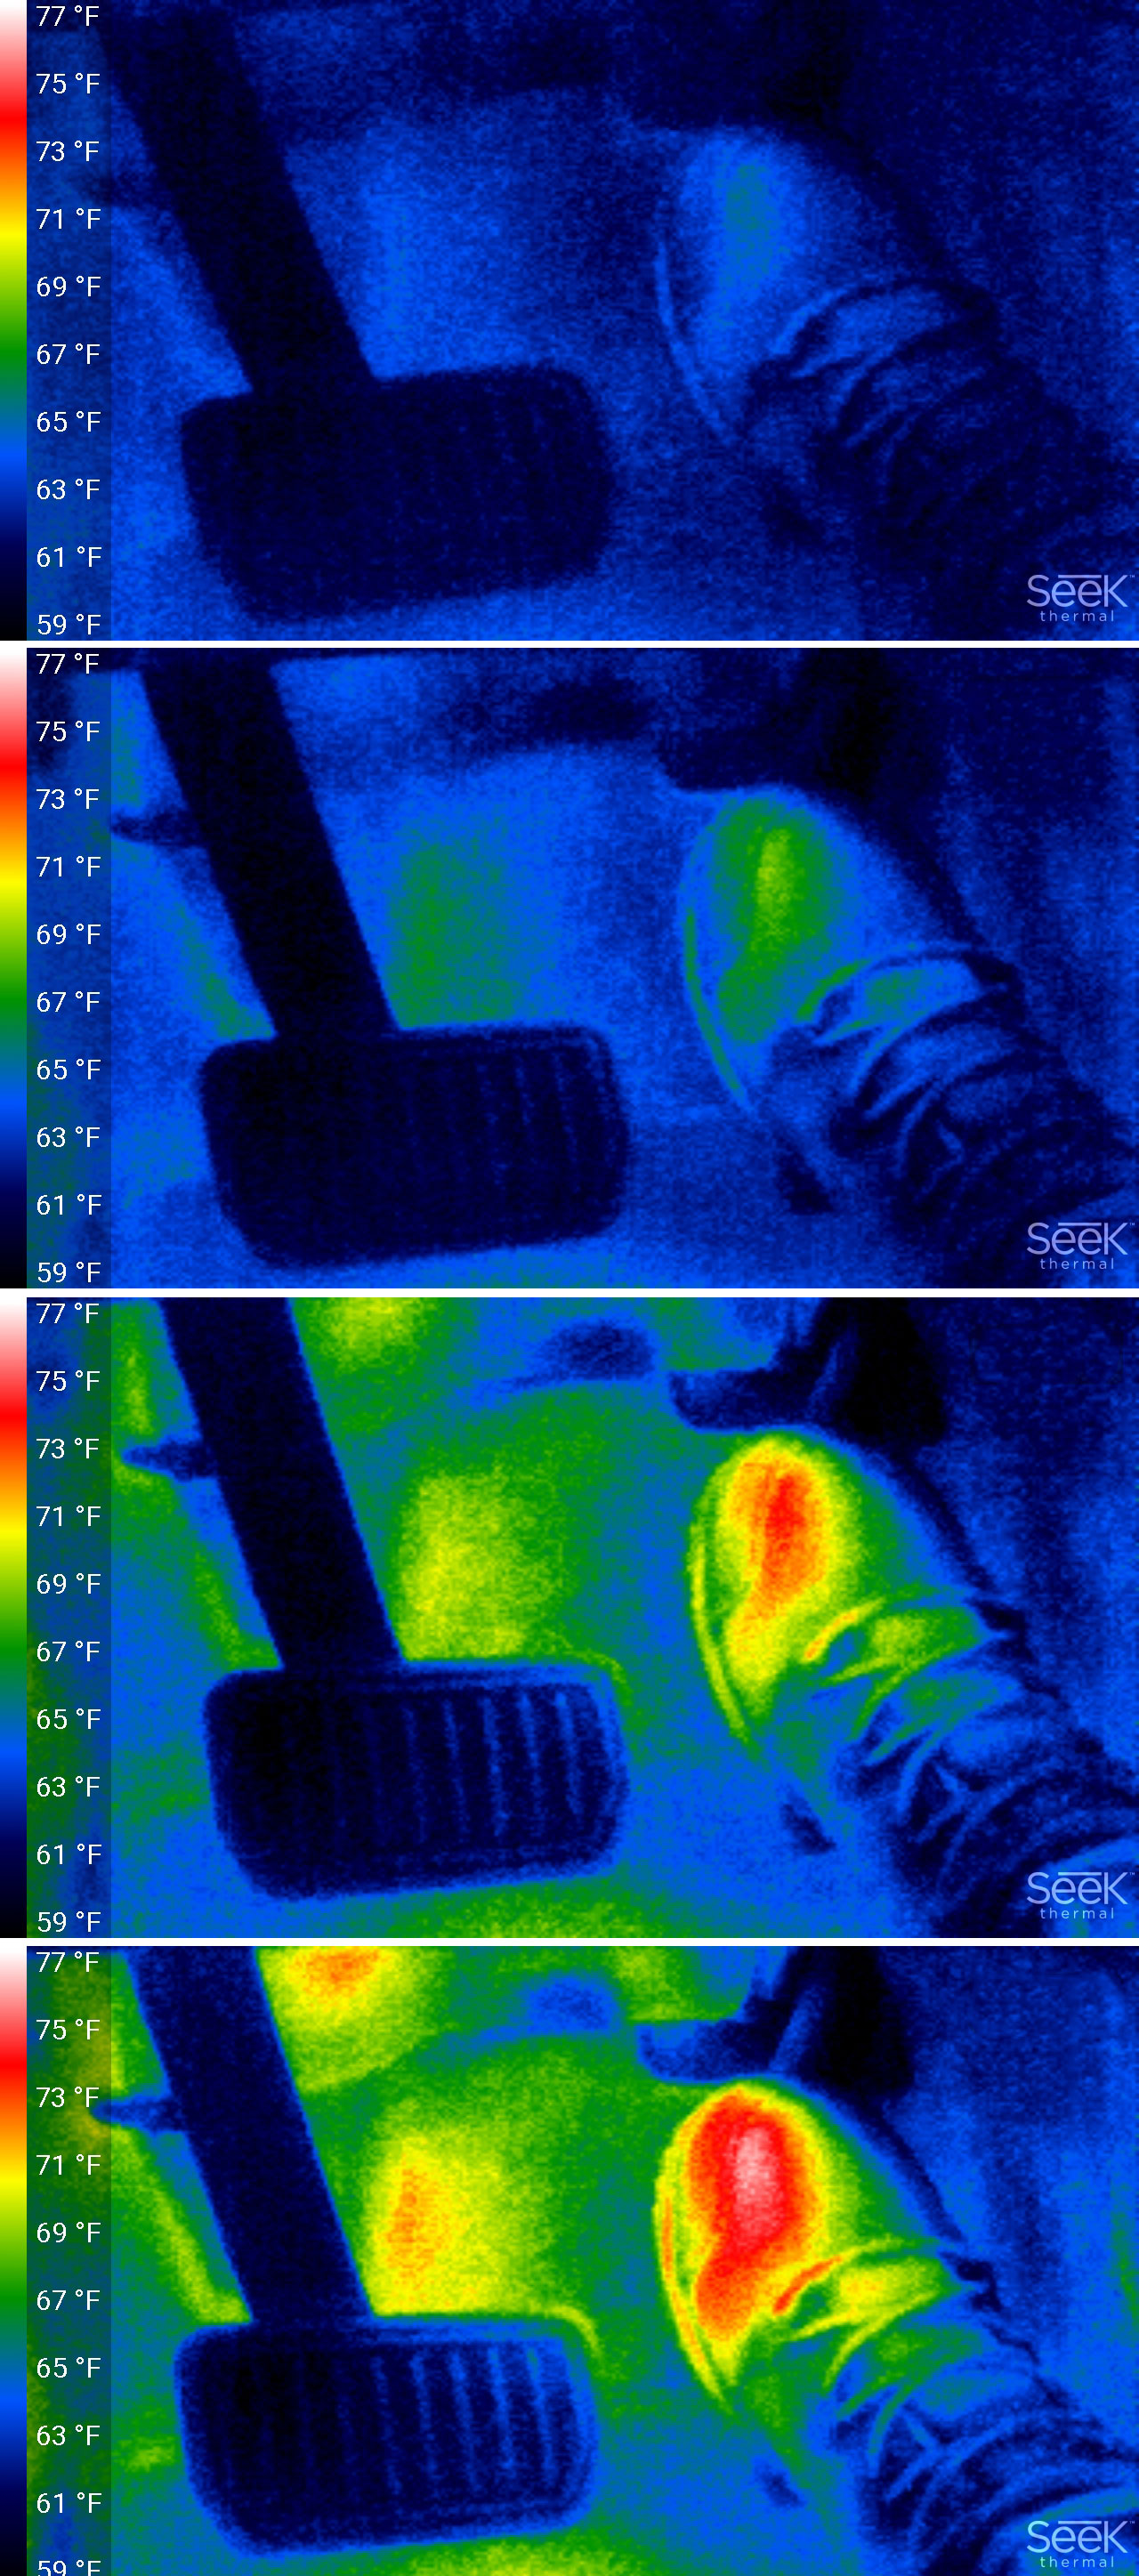
Thermal Imaging with FootWarmer
In actual use, as you’d expect, the heating is not instantaneous. For me, it makes a noticeable difference over time. Prior to the FootWarmer, my right foot seems to never get warm when driving in the cold, especially my toes. If your feet never get cold, you obviously don’t need the FootWarmer!
I made a small number of FootWarmer modules, and they are available to be purchased on eBay for $18.75 and includes free USA shipping.
![]()
- Insert the included screw partially in the hole of the FootWarmer – 1 or 2 turns at most (screw will be loose).
- In your car, move the seat to the rear for more room to work.
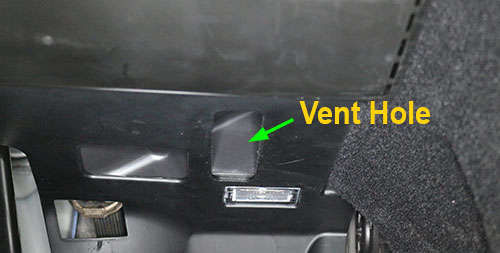
- Locate the footwell vent hole under the dash:

- Complete your installation by viewing this 1-minute installation video. On the final step screwing in the lock screw, do NOT use a power screwdriver and stop when the screw is seated to avoid stripping it out.
I went through 15 designs to create the final easy to install optimized FootWarmer module. It turns out it’s not quite as easy as I expected to redirect airflow! The thermal imaging helped me complete a design that gets the desired results.
Each FootWarmer is made using a 3D printer, taking over an hour for each part. Even with higher resolution printing, the quality is not quite up to injection molding standards. You may notice some minor imperfections that do not affect the function of the FootWarmer. Each part also requires me to do some handwork and machining to complete each module. FootWarmers are created, made and packaged in the USA.
I hope you enjoy using our FootWarmer!
10 comments
Included in the shipping box was the foot warmer and a square sponge with a cutout. Is the sponge part of the foot warming retrofit or is it only used for protection in shipping? If part of the retrofit, please explain how it is supposed to be integrated with the red plastic unit.
The foam insert is just for packing. You can discard it.
Do these fit cars with RH steering (UK)?
Good question. Sorry, I don’t know for sure. If the rectangular hole is the same, the footwarmer would work. There are two rectangular holes in the bottom of the dash. The hole of interest is closer to the center console and near the footwell LED. It is 10mm wide by 27mm long. The length is not important, but the 10mm width is. The airflow redirection will also be correct for RHD as it is turned 180 degrees from LHD cars.
If you order it and it doesn’t fit or you don’t like it, I’ll offer a full refund, and you don’t have to return it. I realize there is some shipping cost outside the USA that is not refundable.
Hi
Did you try this on a UK car did it work?
Sorry, I’ve not tried it on an RHD car. In theory, it may work, but I don’t know for sure. On the LHD cars, there are two vent holes. The one closer to the driver’s seat is 25mm wide (left-right), and longer front-back. The 25mm is the critical dimension. If your vent hole is also 25mm wide, then the footwarmer will fit. This image shows you the two vent holes.
https://teslatap.com/wp-content/uploads/2018/03/install_1.jpg
Hi,
Since you’re stopping production, would you be willing to post your design at thingiverse.com so us 3d Printing enthusiasts can make our own?
regards,
Carl
Hi,
No plans right now to stop production, but if I do, yes, I’ll release it to thingverse.com. I’ve released a number of other 3D plans of Tesla related projects I’ve created. Trying to recover the expenses of making the footwarmer. So far it’s still a net loss as is the TeslaTap site!
Frank.
Great effort. I’m going to Ebay to track one of these down. Interesting that it takes an hour to print one of these. Did you look into contract 3-D printing? I suppose it takes selling a lot of units to Justify injection molding. This is a good product, have you not had much demand?
Definitely a low volume product! Design is also difficult to do in injection molding. I expect it would require two parts. An injection molded part costs about $.02 to produce, but I estimate it would cost $10K or more for the tooling, so not practical for this project!