- Front Seat Generations – Model S
- Replacing Front Seats – Model S (Process 1)
- Replacing Front Seats – Model S (Process 2)
- Replacing Front Seats – Model S (by Tesla Service)
- Modification Photos – Model S
- Alternative Seat Colors and Materials – Model 3
- Related Forum Posts
There are many front seat versions over the years, and not all are backward/forwards compatible with your car. There is an electronics package for seat memory and control, seat heater, seat pressure detector along with an airbag in the side of the seat towards the window. The seat memory controller also controls the steering wheel position motors.
Seat versions often overlapped in time – where newer versions were available along with older versions. Only the GEN 3 option is available now in new cars. The following is the rough timeline for the optional upgraded seats from the base fabric version.
GEN 1 – Original seats, made by Futuris, within Tesla’s factory, included a front pocket. Available in black, grey, or tan leather, with an option on Performance cars for contrasting piping. First cars were released in July-2012
GEN 1.1 – Added seat memory. Late 2012.
GEN 1.5 – Added additional bottom padding and changed the springs slightly (about July 2014). Some versions had Alcantara accents in the side and bottom side bolsters and below the headrest.
GEN 2, called NextGen – These have high side bolsters and the front pocket was removed. Seats are made by Recaro; First introduced at the end of 2014 for the P85D and in Spring 2015 was an available option on all cars.
GEN 2.1, called Premium – Basically these are NextGen maybe with slighter smaller side bolsters. The seat parts were made by Futuris, but assembled by Tesla employees. For a short period, some versions had perforations and a weak fan ventilation system. Introduced in August 2016 with black, white, and tan leather versions. Internal to Tesla, these were called “X on S” as they were originally designed for the X. These first appeared on the Model S P100D, and later became standard on all Model S variants.
GEN 3 – also called Premium, added an electrically adjustable headrest and switched to a longer-lasting ultra-leather type material instead of real leather. This option stared at the end of 2016 and is available in black, white, or cream colors.
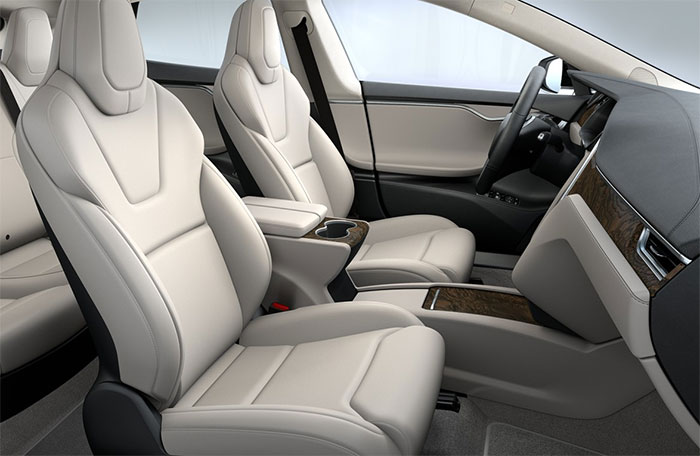
Gen 3 Premium Seats, Cream, 2018
This modification is courtesy of Tom Clark “CEYA GAS” with his permission.
I’ve wanted to add Next Gen front seats to my 2014 Model S for a while now. I had missed the window for Tesla to do it (and I didn’t want to pay over $6,000…), but this is my one bugaboo with our December 2014 build: the seats are not that comfortable for long drives (which we do several times each year).
I found a set of Next Gens here in the SF Bay Area. I met the seller and bought them. Unfortunately for me, I didn’t recognize till after I got home that one was a 2015 vintage (passenger), while the driver’s seat was built in December 2016.
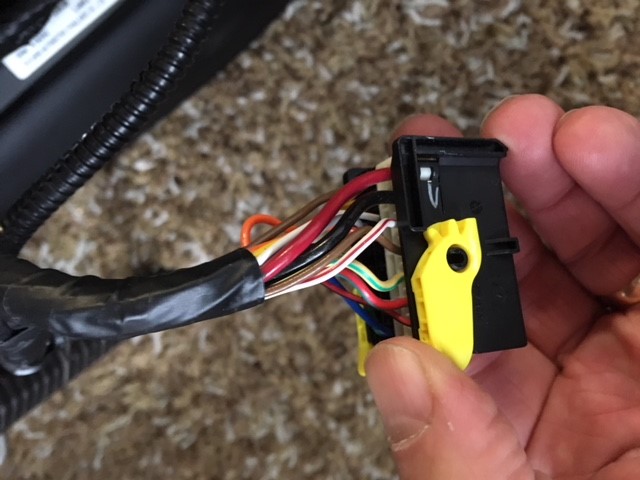
The passenger seat was a direct swap. One wiring harness and the airbag connector. However, when I went to replace the driver’s seat, I recognized the newer seat had connectors that had been totally changed by Tesla and were not compatible with an older car.
Not wanting to tear the seat apart to get all the wires out (there are 25 wires in the two main connectors of the 2014 seat), I started looking at other options. Doing a wire by wire comparison, I found that the 2016 seat only has 24 wires. The one extra wire in the 2014 seat is red with a green stripe. Acquiring a wiring diagram for the 2014 seat, it appears this extra wire is the ground wire for the seat heater. In the 2016 seat, the seat heater ground ties into another wire before the harness, resulting in one less wire.
Otherwise, all the wires match up color for color. Since I didn’t want to tear the seat apart to replace the wires, I decided to explore simply cutting off the connectors from the 2014 seat and attaching them to a 2016 one (there is also a three-wire harness for the airbag mounted in the seat. The connector is also different between the two seats, though the wire colors are consistent).
A couple of points if you ever decide to pull your own seats out:
- Be sure to turn the power off in the vehicle before disconnecting or connecting any wiring.
- There are two different sized Torx bolts holding the seat in. The outer rail is secured by T-40 bolts, while the inner rail is held down with T-47 bolts. Before starting this, I didn’t have a T-47 wrench. I quickly found out that a T-45 socket (that I did have) won’t cleanly pull these two bolts. Buy a T-47 socket and save yourself lots of aggravation.
I initially cut the connectors off the 2016 seat. In doing so, I recognized there are two blue wires of similar size and two same-sized yellow wires. One of the blue wires is the power for the under-seat light. I marked both sides of the cut with black ink to differentiate them. Likewise, I determined where one of the yellow wires terminated at the Memory Seat Module harness (MSM) and marked that wire similarly.
Speaking of the MSM, be sure to take the MSM out of your seat and put it in the replacement one. This will save you lots of grief, as I have been told that if you don’t do this the new seat won’t work in your car until you get firmware reflashed. (I swapped mine, and everything works fine).
The 2014 has one connector with 8 wires, one with 17, and the three-wire airbag connector (the 2016 was two 12-wire connectors). I put a male insulated crimp connector on each wire coming out of the 2016 seat. There is a large black, a large red, and a medium-sized green/yellow wire. Each of these got a larger connector, while all the rest got a smaller one.
I really hesitated in cutting the connectors off my 2014 seat, as I worried that if this didn’t work (or something shorted out), it was going to be a nightmare to remedy. I waited several days before deciding this afternoon to move forward. I pulled the driver’s seat out and proceeded to do the deed. I cut the connectors off the 2014 seat.
Working slowly and meticulously, I added a female insulated crimp connector to each wire of the 2014 seat harnesses. I had left about 4″ of wire on each connector harness and ignored the red/green wire in the connector. I plugged each in, checked to be sure the connections were all solid, then wrapped each connection bundle with tape. I did the same with the airbag harness.
Putting the seat into the car, I plugged the connectors into the sockets, and loosely bolted the seat down. With trepidation, I turned the car back on, and lo and behold, everything works. No error messages, all the functions are there, and the memory module (while having to have settings reset) works fine. Bolted the seat all the way in, and test drove it. So much more support than the original seats!
The last thing I need to do is go to a Tesla approved body shop and have the tethers installed between the door panels and the doors (new with the Next Gen seats). I investigated the airbag timing, and have been assured that the change is so minute that it is not a problem, so for now I am not going to worry about having the airbag control module refreshed.
While I just finished, I’m already glad I went this route. I knew that if I tried to remove the wiring harnesses completely from the seat that I would screw something up majorly.

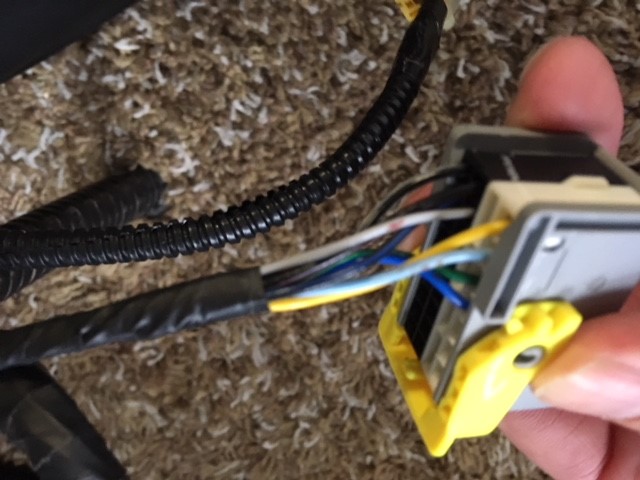
Newer 2016 connector removed from seat (to be discarded)
Newer 2016 connector removed from seat (to be discarded)
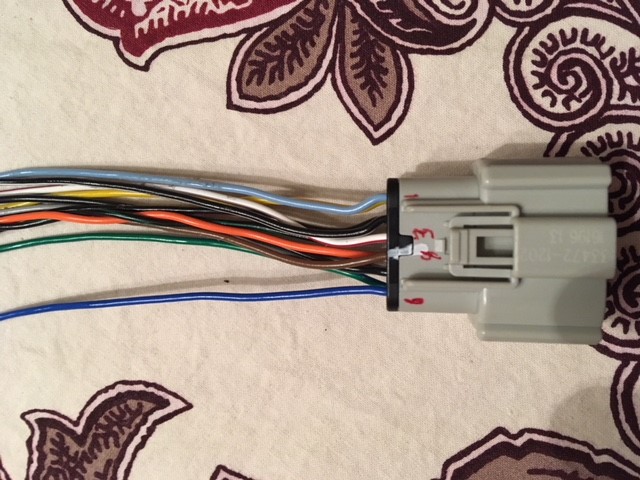
Older 2014 style connector removed from old seat
Older 2014 style connector removed from old seat
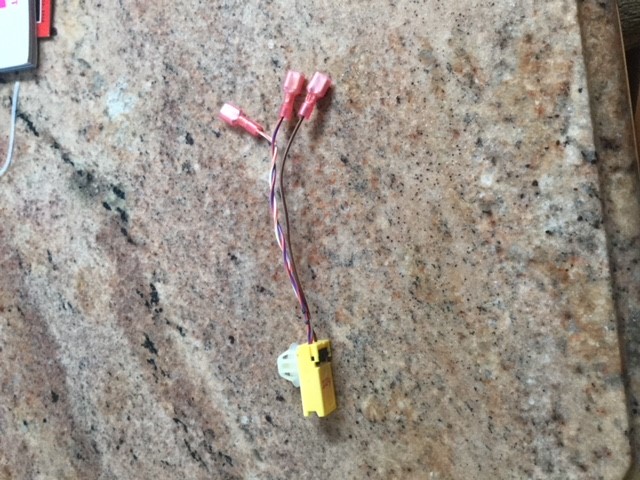
Airbag connector removed from old seat, with added spade lugs.
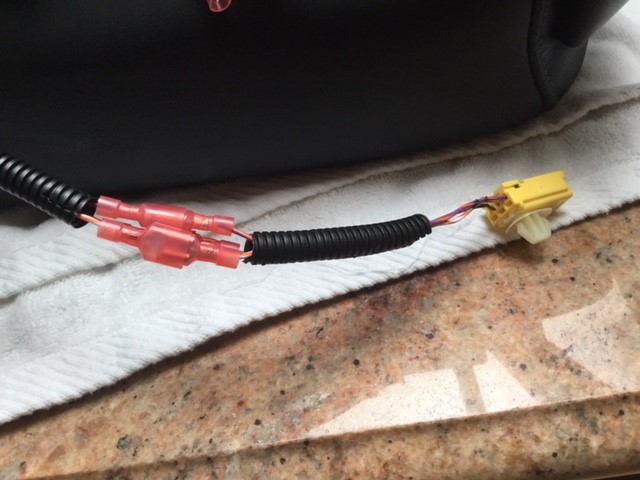
Old airbag connector attached to the new seat
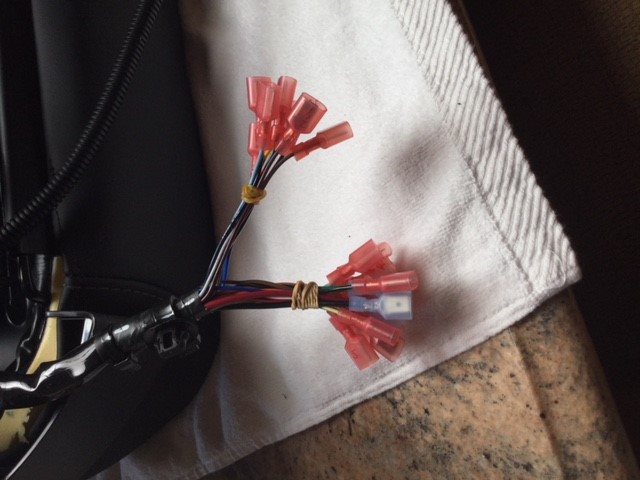
New seat, with removed connectors, wired to spade lugs

Final “2014” connector wiring on new “2016” seat
This modification is courtesy of Victor A. Lopez with his permission.
I have always wanted the newer NexGen seats, so I finally purchased some used for $1400 on eBay. It was the only pair on the internet so I had to pay the steep cost.
Important: First turn off the vehicle power from Controls, E-Brake & Power off-screen before doing any work.
After I removed the seats with the T47 & T40 bolts (total 4 bolts) I put the seats next to each other on the garage floor to see what exactly was different. I have a rubber floor so I wasn’t worried about damage to leather/ plastic. Below are the images for the Driver’s side seat only. The passenger side seat only has the Grey and ABS connectors (total 2, easier).
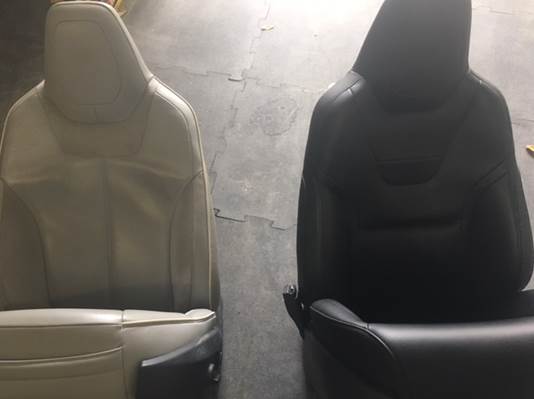
Comparing old vs. new driver’s seat
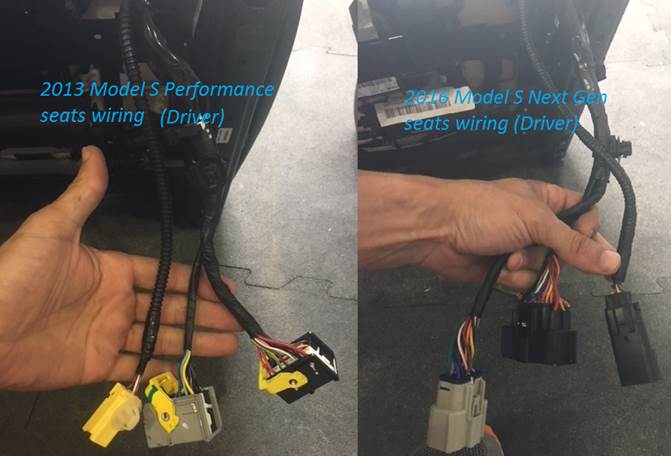
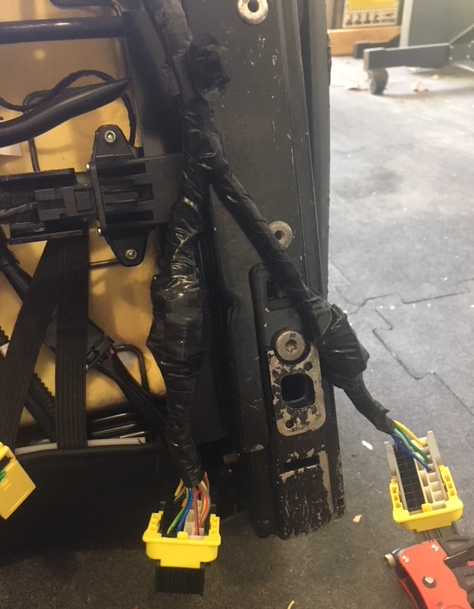
View the wiring with the seats flipped back
My next step was removing the electrical tape to expose the wiring. I like to build momentum at the start of a project by doing the easiest thing first. So, I decided on doing the ABS (Air Bag System) connector.
ABS Connector: I cut off the old harness from 2013 seat about 4 inches up & did the same to the 2016 seat. The wires are EXACTLY the same colors so I connected them one at a time. I did notice the 2016 seat harness had an extra wire so I didn’t connect it but instead covered it with electrical tape. Below is the pic when I was complete but before the whole thing was wrapped in electrical tape.
TeslaTap Note: different vintages of cars use different color wires in this connector. If the colors do not match, we suggest contacting service to identify the correct wiring. This is important, as a miswire may disable the side airbag!
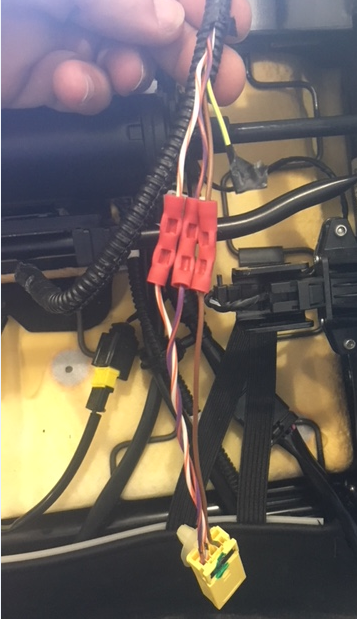
ABS connector, 4 pins, 3 wires
Grey Connector: The wire colors should match exactly. The extra wires that have red crimps on them in the image are for the last black connector. In the image I removed the Tesla applied electrical tape all the way to the Y (later moved the extra connectors to where the other wires were).
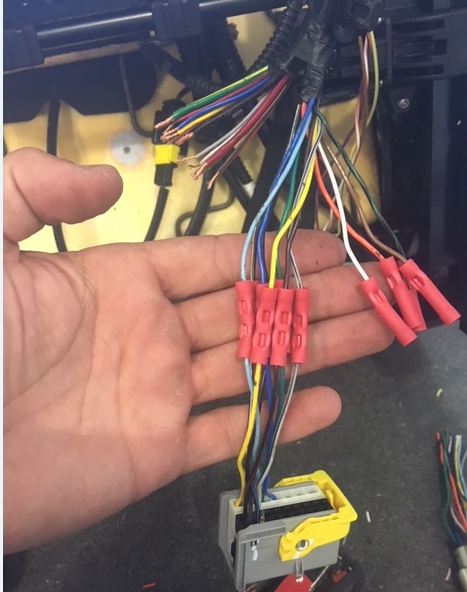
Grey connector, 25 pins, 8 wires
Black Connector: the wire colors should match exactly. Below is an image when completed.
All connectors completed and taped up.
Memory Seat Module (MSM): The last step was just swapping the black box under the seat–there were two 8mm nuts to remove. It is a direct swap and the connectors plugin perfectly.
I installed the seat into the car and powered it back on. No problems and everything worked great. Time to clean and condition the leather!
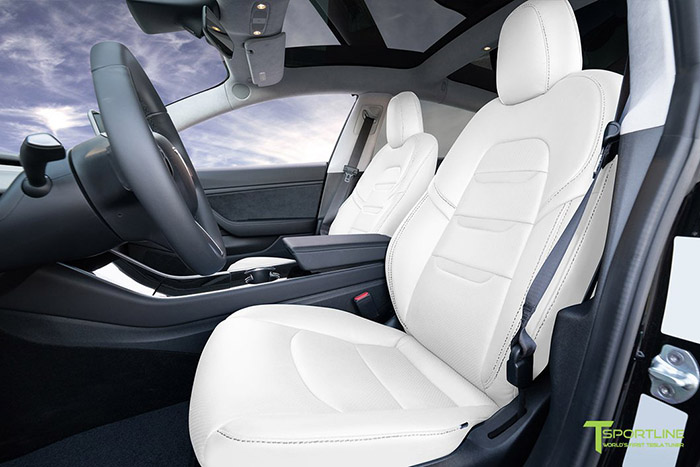
For the first year of production, all Model 3 seats were available in black synthetic leather. T Sportline offers a kit to change the color and material to a choice of synthetic leather or real leather and offers several styles as well. We’ve not tried the kit out, but worth mentioning here as a good option for those that don’t like black seats.