If you own an S or X made between 1-Oct-2016 and 1-Aug-2017 often referred to as HW2.0, and you have had the HW3.0 AP FSD computer installed, you will find the cameras have a fairly poor color rendition for dashcam video. This modification updates the side repeater cameras with better color rendition. (Jul-2020).
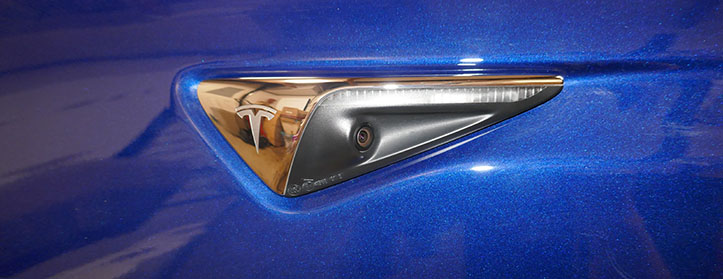
The original repeater cameras use a monochrome/red design. There are four photocells for each pixel. In these older cameras, there are no filters on 3 cells and the fourth cell has a red filter. The 3 monochrome cells are used together to improve light sensitivity, especially at night.
New cars use a full-color camera. The four photocells for a pixel have one red, two green, and one blue filter. The two green cells are combined to provide more green sensitivity, often done with color cameras of all types. This camera can also do white balance, to adjust the tone of white in various conditions, such as under sunlight or nighttime under street lights.
Both types of cameras will provide the same Autopilot capabilities and both use High Dynamic Range (HDR) to be able to handle bright light sources such as the sun or headlights with minimal image blowout. Using the dashcam feature with the older cameras shows washed out colors in videos. Tesla actually recreates the colors from the monochrome/red camera. It can make reds, yellows, and teal colors. It can’t really separate out green from blue. The images almost look like antique hand-tinted black and white photos You can fairly easily replace the two repeater cameras with full-color cameras to get a better quality dashcam recording from the sides.
The cost from Tesla of the side repeater cameras is about $130 each. Sometimes you can find used ones on eBay for about half that cost.
If you have MCU1, we do not recommend this upgrade. The recording quality is rather poor already, and new cameras are not going to help that. It is most useful when you have also done the MCU2 upgrade, where it can reliably record the video.
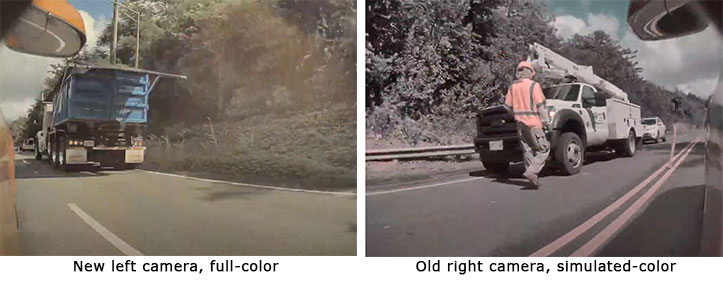
On the left with the new camera, notice the blue sky and rear of the truck and the green trees. The colors are good, but not perfect. The car is red, but at the top of the mirror, it looks more yellow-orange. This may be due to white balance errors. In some frames, it is closer to red. On the right is the old camera. Notice how washed out the colors look with the trees looking grey.
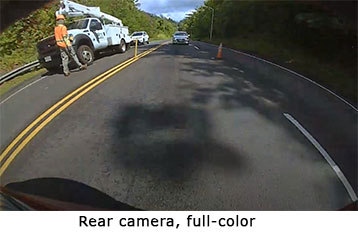
This next shot is the rear camera. It uses a different camera than all of the others and has the best contrast and color fidelity.
Tesla only sells the camera as part of the side repeater assembly. We can confirm the Model 3 camera works fine in the Model S/X as well and could be cheaper on the used market.
| Tesla Description | S/X Part Number | Model 3 Part Number | Notes |
|---|---|---|---|
| LAMP ASY, SIDE REPEATER (RH) | 1125107-00-E | 1125107-77-E | Right side |
| LAMP ASY, SIDE REPEATER (LH) | 1125106-00-E | 1125106-77-E | Left side |
Video of removal and installation (courtesy of ColoradoDetail)
Removal and Installation of left repeater step-by-step:
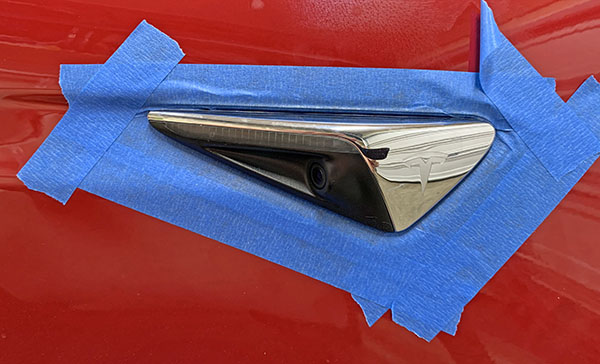
- Take painter’s tape and tape around the three sides of the repeater to protect the car’s paint.

- Turn the front wheel either left or right full so you can access the bottom of the wheel arch liner.
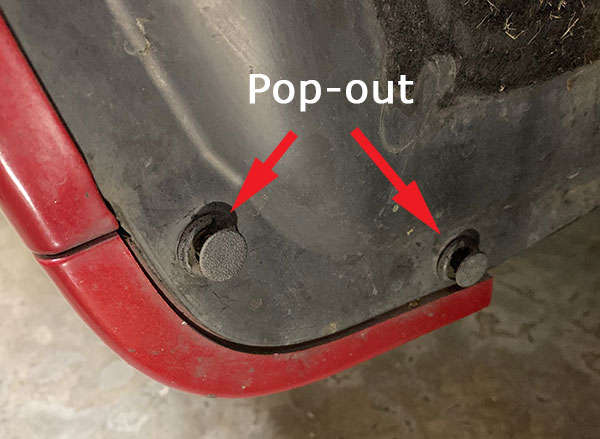
- Using a trim removal tool, or narrow screwdriver, remove the two rubber snap rivets at the bottom of the liner.

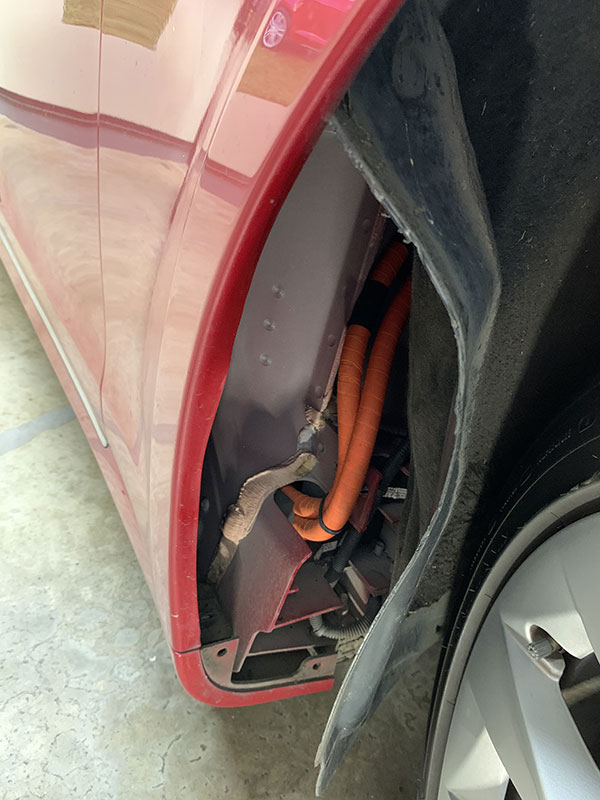
- Pull or push the liner toward the center of the car to clear a way to get your hand and lower arm up inside the wheel well.

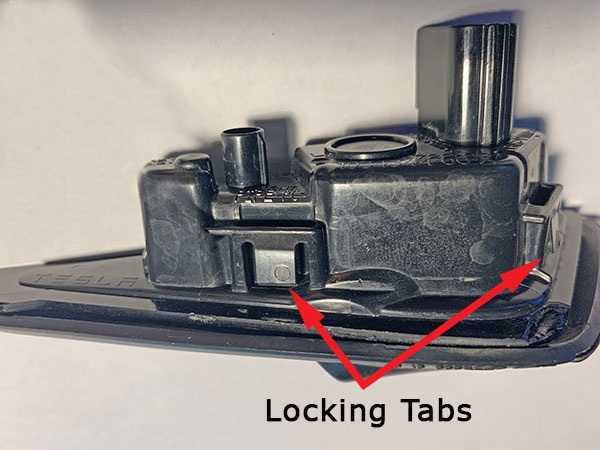
- Look at your replacement repeater. Notice the two lower locking tabs. They can be moved with your fingers. The top “hooks” do not move.

Two locking tabs on the bottom
- Push the lower tabs as you use a plastic trim tool to lift the repeater out of the fender, carefully.

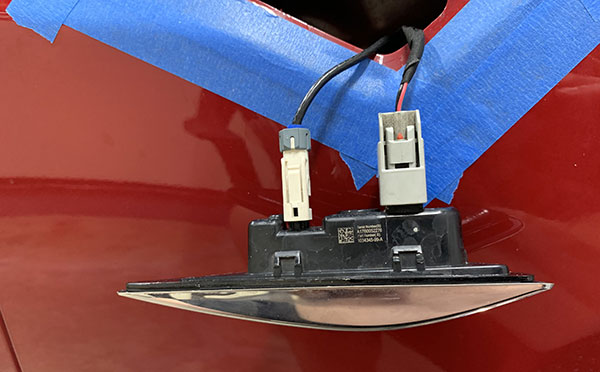
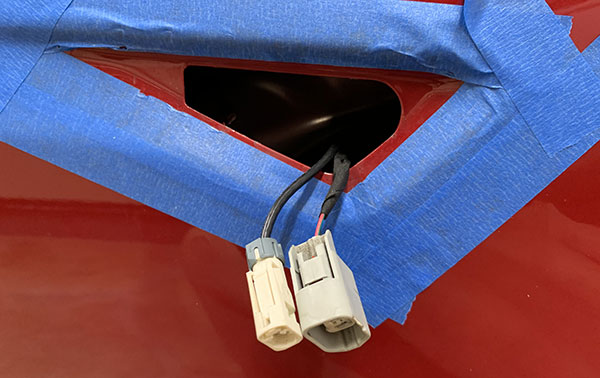
- Disconnect the two connectors, remove the side repeater.

- Installing the new repeater, connect the two connectors.
- Hold the new repeater in place at the opening and angle the top in place first to hook the two hooks in place behind the metal. Push the bottom of the repeater until you hear the repeater seat with a soft snap.
- Pull the wheel arch liner back down in place, and make sure it’s behind the fender lip
- Use a Phillips screwdriver or a Torx T20 screwdriver to help align the hole in the lower liner before you put the rubber snap rivets back in. Be careful that you had the top popped out so the lower section of the rivet seats before you push the top cap down locking it.
While not a dramatic difference, the side dashcam recordings are clearly better now! Our thanks go out to Akikiki for this project and videos!