Cleaning can increase your solar production. This of course depends on how dirty the solar portion of the roof is. Lots of leaves and debris will have a large effect. Dust, pollen, and ash can vary a lot from one area to another. With our west coast wildfires, some homes have so much ash that there is almost no solar production! Also, the roof looks a lot better when clean. Likely a poor reason, but it is a consideration. (Jul-2024 Update)
While you might be smart to hire someone to clean the roof, I worry they don’t know what they are doing with a Tesla solar roof. These roofs are different than solar panels and take a little more care. The big concern is safety and there are always risks when on a ladder or walking on your roof. Those with higher-pitched roofs and/or multiple stories might want to leave it to the pros.
I’ll explain a number of DIY cleaning approaches for a single-story roof, the equipment needed and the effectiveness, and what to watch out for! Of course, you can modify any of these approaches, and I’m sure there are other approaches you may find useful.
Safety Tips
Do not spray into the ridge vent! The top peaks of your roof may contain a ridge vent. If you spray at the ridge from a low angle, water may go into your attic! Better to spray above and let the water fall like rain.
Do not spray under the edges of the tiles – While these are robust, with enough pressure you might harm a connection or solar cell under the glass.
You can walk on the roof but avoid using metal objects that might drop and shatter a tile.
When walking on the roof, don not use regular shoes or tennis shoes. Only use special shoes that are designed for slick and wet surfaces. Normal shoes are very slippery, even when the roof is dry. Do not risk it! I’ve had good luck with slip-resistant sneakers from Shoes for Crews brand. I’m sure there are others too but be very careful until you are confident your shoes do not slip!
When walking, try and step on the flat portion of the tiles. You want to maintain as much surface area as possible, especially when one foot is not in contact at all. Stepping on the hose or leaves is especially slippery!
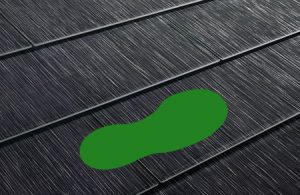
Good
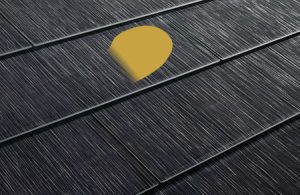
Avoid Edges
Avoid Partial Contact
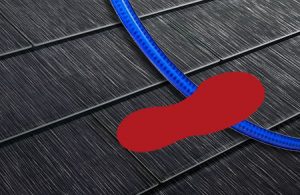
Do Not Step on Hose
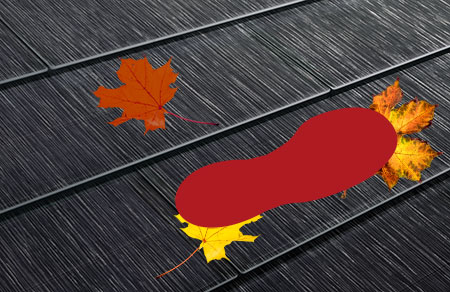
Do Not Step on Debris
Ideally, like a pro, you’d use a secured rope and harness, that would prevent falling off the roof. Family Handyman offers one Guide on using a harness.
Valley Cleaning
If you have roof valleys, these tend to collect leaves and debris. Cleaning the valleys may not improve solar production but debris could blow out later onto the solar sections of the roof and it looks bad.
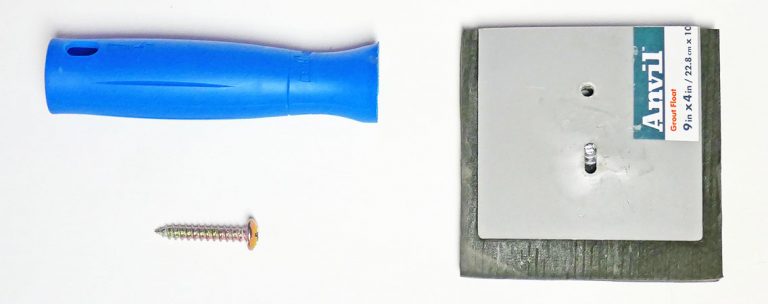
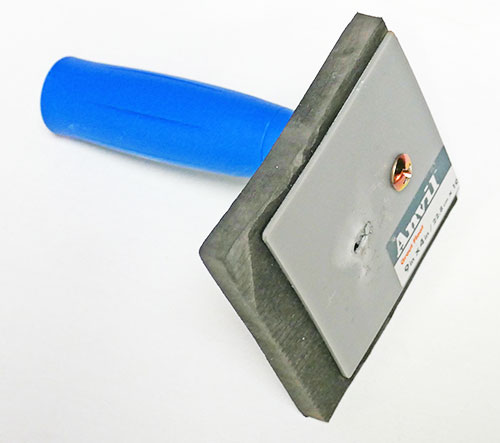
I made my own pole attachment that fits in the 4” valley that I can pull down the debris that collected in the valley.
I bought an Unger 6” mini scrubber and cut off the scrubber leaving the handle. I then took an Anvil 6” x 4” plastic economy grout float and cut it down to 4” and sawed off the handle at the metal attachment. I then drilled a hole in the float and the scrubber handle.
I used a large screw and bolted the two parts together. This then snaps to a Unger long extension pole.
Now it is easy to start at the top of the valley and drag the square in the valley to collect leaves. The soft plastic avoids scratching the metal valley.
1 - Let it Rain
This is clearly the safest and easiest but doesn’t work well for those of us in dry climates. In our part of California, we don’t get any rain for 6+ months at a time. It may not be all that effective either depending on the strength of the rain and how well dirt and debris have stuck to your roof.
Update: After a good rainstorm, it did a good job. A couple of months of more ash had accumulated on the roof. The rain washed most of the ash away and boosted solar production by about 10% from my last power-wash cleaning.
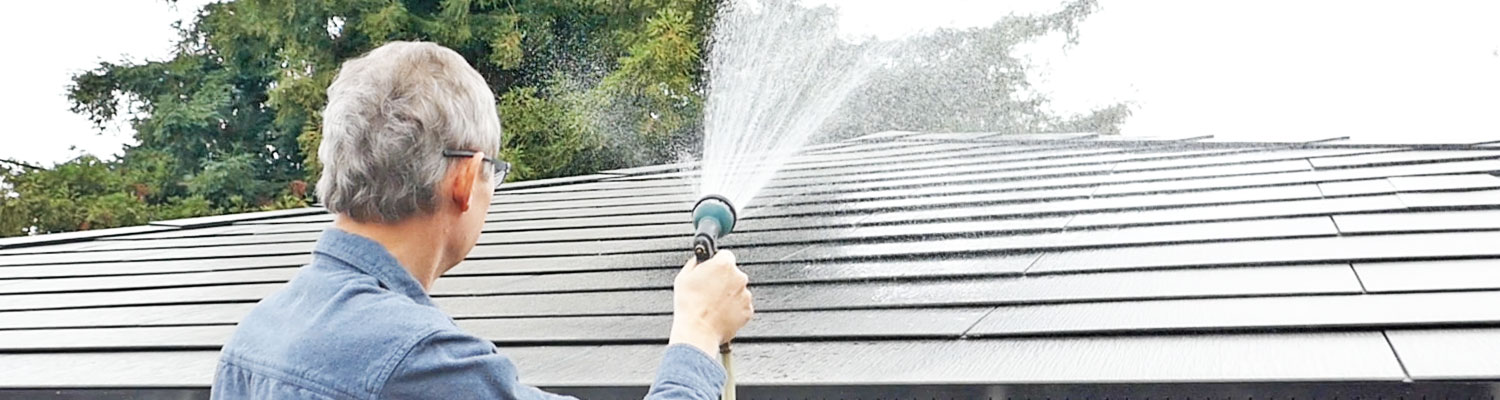
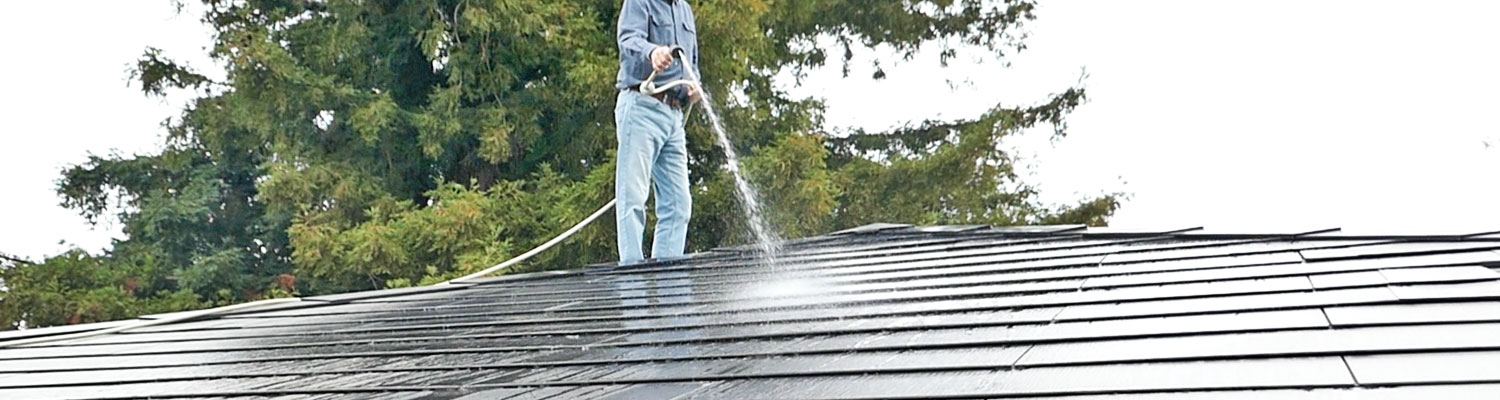
2 - Hose Rainfall
Using a garden hose with a spray attachment can help but will not really clean the tiles. This is easy and fairly low risk. You may need a ladder to reach onto the roof. You should spray upwards so the water falls like rain. Do not spray into the edges of the tiles.
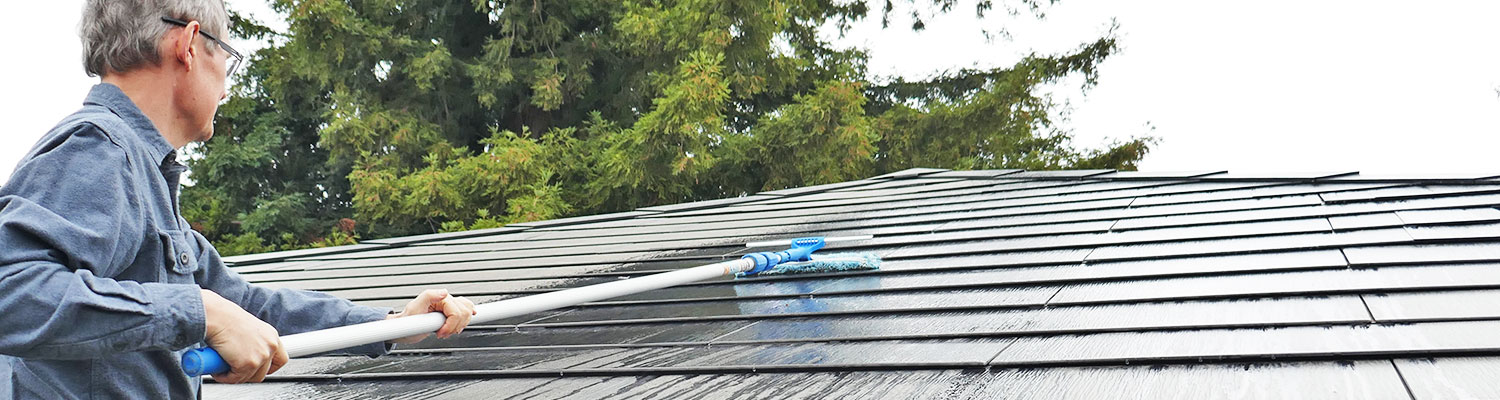
3 - Soapy Mop
I first wet down a section of tiles, starting at the ridge (see Method 2). With the mop head on a long extension, standing on the ladder, I soaped up the head and wipe a section of tiles. I then rinsed off that section. Depending on how hot it is, you want to limit the section so that it doesn’t dry out before you can rinse it off. Clean the mop head after each section and soap it up again.
This worked great on my prior solar system with panels but was less effective than I expected on my solar roof. This was better than Method 2 but still left some dirt and ash for the amount of work it required.
Tools and Equipment
Ladder – A step ladder 6-8 feet high
A long extension pole. I use one made by Unger that extends out 24 feet.
A mop window scrubber attachment to the extension pole, 14” wide
A wide bucket that you can dip/clean the mop head
Detergent – I used car cleaner detergent, but I expect any will do
Hose and sprayer
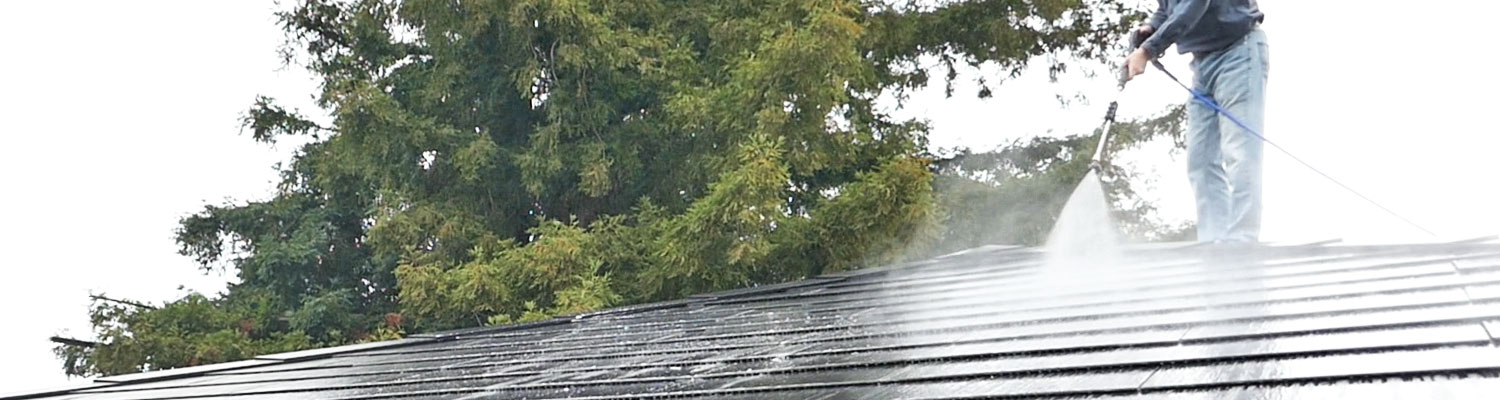
4 - On Roof Water Jet
Using a hose and a water jet nozzle spray the tiles. This is more effective as you can get closer to the tiles and you’ll be spraying from the ridge down the slope. You should avoid spraying up into the ridge vent and under the tiles.
Tools and Equipment
Ladder – suitable for safely getting on and off of the roof.
Hose – A long enough hose to reach everywhere, perhaps 100 feet. You do not want to use multiple hoses connected, as the metal connection if dropped on a tile could shatter it and the connection could catch on a tile when moving around.
Sprayer – Use a sprayer attachment that has a water jet selection. It should be plastic or rubber-coated. Again, you should not use any metal items while up on the roof that if dropped could damage a tile.
Non-slip shoes – See Safety Tips for more details
With a thin layer of ash, I found it knocked off quite a bit but didn’t fully clean the tiles. They look quite a bit better, but still, look dirty. I got about a 7% improvement in solar production after using this technique.
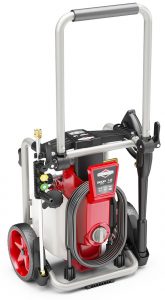
5 - Pressure Washer
This requires more care but has the best results. I used a pressure washer that has a detergent reservoir as part of the pump. You first soap down an area using the soap nozzle. Then I switch to the 40° nozzle to rinse it off. Avoid other higher pressure nozzles that could strip the paint off the metal and cause other damage. Like Method 4, it is even more important that you only wash at an angle down-slope.
Tools and Equipment
Pressure washer – Actually those with lower pressures are better. I choose an electric pressure washer, as it is easier to use.
Adjustable nozzle head (optional) – Some higher-end units offer this, but you can buy ones for under $15. I bought one aftermarket. It’s well worth it, as you can very easily change between soap and the 40° setting. With the standard nozzles that come with most units, if you dropped one while changing, it could easily smash a glass tile.
Hose – You’ll need an extra length of hose, likely at least 50 feet. You don’t want a connection to drop on a tile or get hung up on a tile when moving around so the length should be long enough to get everywhere you need on the roof without getting to that junction. You also want a very flexible hose. Often the stock hoses are rather stiff. Might be worth considering an Ultra-flexible hose, but they are more expensive than the cheap ones.
Pressure washer detergent (optional) – For pressure washers that have a reservoir as part of the unit, you can add the concentrate to the tank. The washer will dilute it with water at a ratio of about 20:1. I used Krud Kutter biodegradable Vehicle and Boat concentrate, although others may work well too.
Non-slip shoes – See Safety Tips for more details
Selecting a Pressure Washer
If you already own one, use it. For those thinking about a pressure washer, you don’t need high pressure for this job. Any unit that has 1500 PSI or better will work fine. For me, I only considered an electric pressure washer. I avoid gasoline tools as I hate to deal with gas, oil, warmup time, noise, and various adjustments needed to make it work.
Other considerations include:
Quietness: An induction motor is quieter lasts longer, but costs more than a universal motor used in lower-end units.
Size: Some are quite compact or adjust to a small size for storage, others not so much
Detergent reservoir: This is handy. You just change the wand tip to the soap tip and the lower pressure feeds detergent into the system. Switch back to the 40° nozzle, and you can rinse. No need to get off the roof or deal with a cumbersome foamer.
Reel: Some include a reel for winding up the hose. It may be handy, but it’s easy to roll up the hose on most systems without a reel.
Hose length: Most come with 20 or 25 feet of hose. This will not be enough, and you’ll need another 50 feet or so. Many extension hoses come with the extension adapter. Check your unit to see if it uses M22 14mm (most do) or M22 15mm at the end of the unit’s hose.
Auto-stop: Most better units will automatically stop the pump when you stop spraying and start up again as soon as you start spraying. It extends the life of the motor.
Price: I saw one at $49 and almost no limit to the upper end. Excellent consumer power washers seem to be in the $150-$250 range.
Your needs and what you are willing to pay are likely different than mine. I ended up getting an electric Briggs & Stratton model 20681. It uses an induction motor, is fairly compact, and has a detergent reservoir. Other makes I considered included washers from Greenworks, Karcher, Stanley, and SunJoe.
I’m happy with the Briggs, but the supplied hose is 15mm on one end that connects with the washer, while the other end is 14mm. If you get it backward, as I did at first, it leaks like a sieve! The threads are the same for M22 14mm and 15mm connections- it’s the inner connection that has a different size.
6 - Leaf Blower
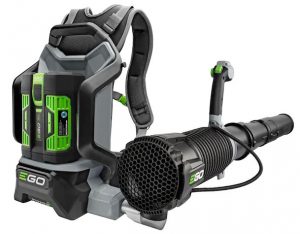
During several high wind events in late Summer, a large number of needles and leaves collected on the roof. Solar production was not nearly as high as normal, so in this case, I got on the roof with my electric leaf blower. This took about 20 minutes to blow off all the debris. Solar production immediately increased by 60%! As noted before, be very careful where you step to avoid placing your feet on leaves or needles. They are very slippery!
I’d recommend a good battery-powered blower, and avoid ones with a cord that might get hung up on a tile edge. Gas could work as well, but as I noted earlier, I hate noisy gas tools and avoid them. I use an Ego 56-volt backpack blower, which has similar CFM as gas-powered blowers. The market has grown in the last few years, so there are many others to pick from as well.
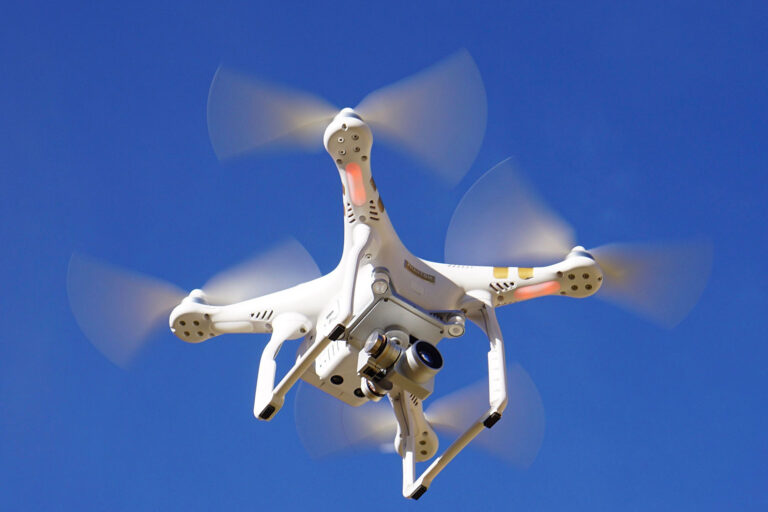
7 - Drone
I hate getting on the roof, as it is always risky. We get a lot of leaves and needles on our roof during the fall season. So I bought a drone and using the down-wash, use it to blow the leaves off. It takes a bit of work to get the hang of a drone, but I can usually clear the entire roof in about 30 minutes. Here’s a case ware a larger older drone is best, as you are looking for lots of air flow and don’t care about much else.
I bought a used DJI Phantom 3, which is somewhat obsolete today as far as drones go. DJI software is a bit finicky, and no updates have been available for years. Still it does the job as it has great downward airflow. The Phantom 3 only lasts about 20 minutes on a charge, so you can have two batteries to quickly switch between sessions, or use a single battery and charge it up between sessions. I also put green blade protectors on my unit, shown in the video below. This was the 2nd time I’d ever used a drone, so it took a bit longer to get the hang of controlling it!
If you live very close to an airport or other key restricted areas, a drone may not work. They have restrictions on where they can fly. In addition, you need to become an FAA-Certified Drone Pilot and get your Remote Pilot Certificate. This is relatively easy to do and helps you understand the rules and operation of your drone for personal use.
Conclusions
Overall, I’ve spent about $1000 to buy everything I talk about here. Obviously, you don’t need to buy everything depending on which method you elect to use. There is a lot to be said for just letting the rain take care of it! Even the pressure washer didn’t completely clean off the ash on my roof, but it did the best job of all. With the pressure washer, I’m not sure spraying detergent before rinsing helped all that much. You may want to skip that step.
For cleaning results, here’s how each method worked for me:
Let it Rain – Good
Hose Rainfall – Poor
Soapy Mop – Good but a lot of effort
On Roof Water Jet – Good
Pressure Washer with Detergent – Best
Pressure Washer without Detergent – Almost Best and less effort
Leaf Blower – Very good, although tiles were still dusty
Use a Drone – Good, easy and safest method
Update 1: I finished cleaning off the roof – or at least all the solar areas. I likely spent about 3 hours on the roof, but some of that time was for photo setups and learning what works, so I’d guess my roof could be done in a couple of hours, broken up into four 30 minute segments. In some areas, it is still is a bit dirty, but not nearly as bad as when I started, so don’t expect it to look new unless you go over it several times.
I started to slip once when putting my foot on the hose when not paying attention. I completely slipped and fell doing the last section. Bam! Onto the glass roof and slid down about 8 feet. No tiles are broken, but scary. This is with the right shoes, and the area was wet, but no soap. One shoe had collected quite a bit of small needles that were on the roof from a redwood tree. It made one shoe really slippery. I swept off the needles from the shoe and finished the job. I expect stepping on wet leaves would also be very slippery, so be careful!
Update 2: Used the rain to clean off the roof. Does a good job and is by far the easiest. Too bad 6-8 months of the year we don’t get any rain!
Update 3: As of late 2021, our area of California is in severe drought, so we are avoiding using water methods for now. Instead, we used the leaf blower to clear off needles and leaves in late summer. Quick and easy with good results.
Update 4: We used a drone to clear off leaves and needles. This is by far the safest method as there is no need to get on the roof.